Managing CyberPanel users effectively allows you to delegate hosting responsibilities to technically skilled users on your server. By granting appropriate permissions, you can empower users to manage their data and databases while you focus on server administration. This guide walks you through creating, modifying, and managing CyberPanel users and their Access Control Lists (ACLs).
So here's how you do it
-
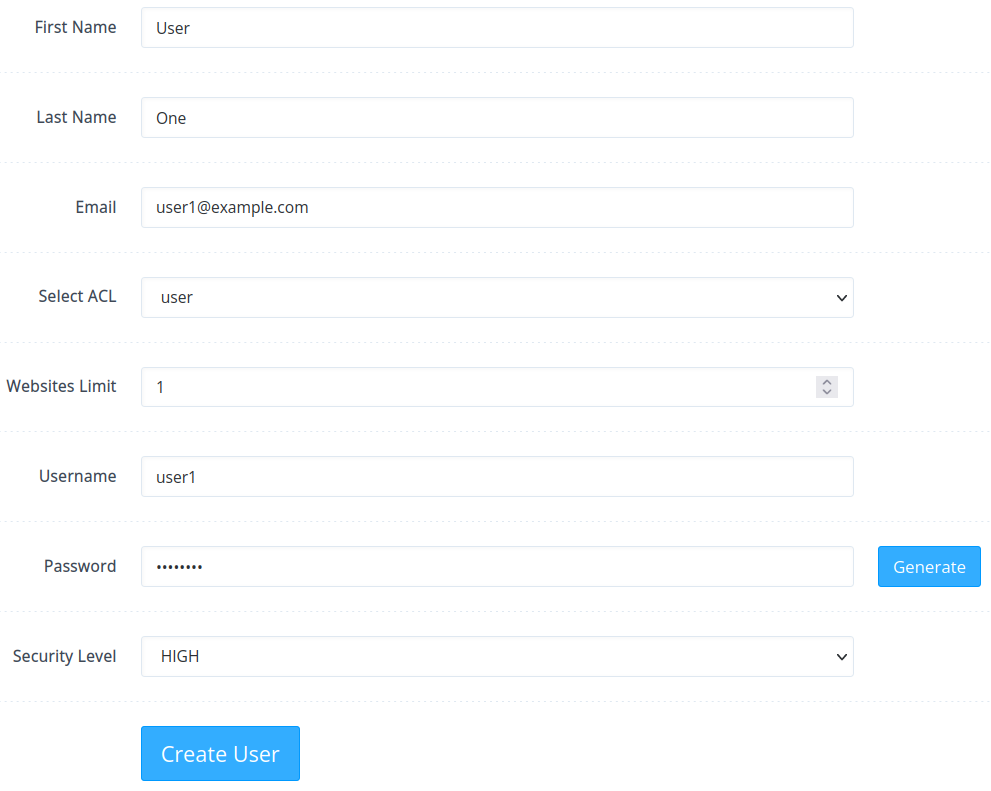
Step 1: Create a new user
Log in to CyberPanel and navigate to Users > Create New User from the left sidebar.
Provide a name, email account, and select an Access Control List (ACL) preset. The default options include admin, reseller, or user.
Define a reasonable website limit for the user (you can modify this later). Note that this variable doesn't impact users with the "user" ACL, as they cannot create CyberPanel-managed websites.
Enter a username and password. It is advisable to maintain the security level as "high."
Click Create User.
-
Step 2: View all users
To access a list of all CyberPanel users, go to Users > List Users.
The table displays user names, website limit, current disk usage, user type, owner (admin user or reseller), status (active or inactive), and options to suspend/activate, edit, or delete accounts.
-
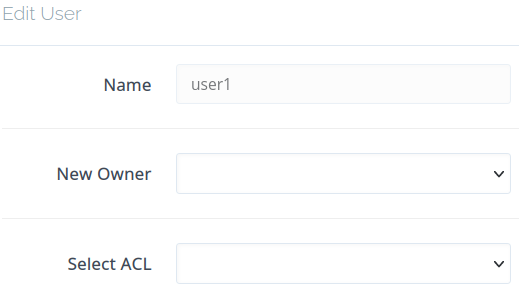
Step 3: Edit user settings
As your user list grows, you may need to transfer ownership or adjust permissions. Click the Edit button in the user list to modify:
- Change the owner to another user
- Adjust the Access Control List (ACL) between admin, reseller, user, and custom ACLs
Changes take effect immediately.
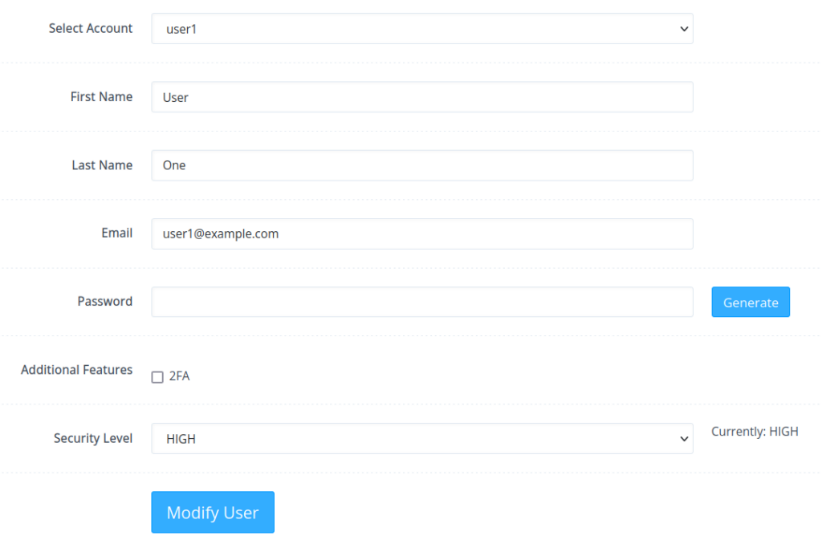
To modify additional settings including two-factor authentication (2FA/TFA), go to Users > Modify User, choose a CyberPanel user from the drop-down menu, make your changes, and click Modify User at the bottom to save.
-
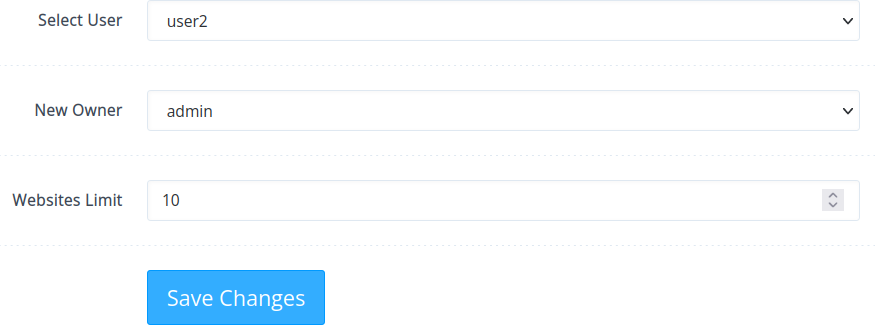
Step 4: Change website limits in Reseller Center
To modify user account ownership and website limits, go to Users > Reseller Center from the sidebar.
Choose a user from the drop-down menu, set the new owner and website limit, then click Save Changes.
-
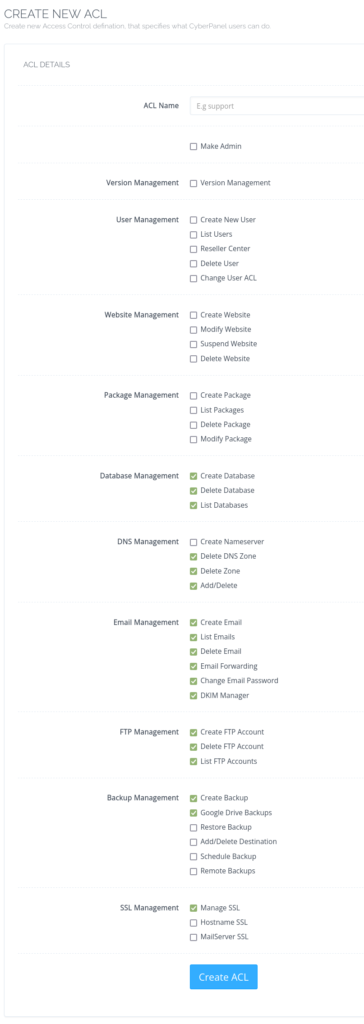
Step 5: Create custom Access Control Lists (ACLs)
The admin, reseller, and user ACLs are non-modifiable and non-deletable. If users require a personalized set of privileges, create custom presets by navigating to Users > Create New ACL.
Enter an ACL name, select the checkboxes for the desired features, and click Create ACL.
-
Step 6: Modify existing ACLs
To edit a custom ACL, navigate to Users > Modify ACL from the sidebar.
Choose an ACL from the drop-down list, make the necessary changes, and click Save Changes at the bottom.
-
Step 7: Delete custom ACLs
To remove a custom ACL, go to Users > Delete ACL from the sidebar.
Pick the ACL from the drop-down list, click Delete ACL, and confirm with "Are you sure?"