SSH is a network protocol that facilitates secure system logins and data exchange. This tutorial outlines the steps to configure and deploy SSH keys using cPanel for enhanced security. SSH encrypts login details, commands, and text, providing a secure channel for data exchange between devices.
Benefits of SSH Access
Enabling SSH access provides the following advantages:
- Remote hosting control
- Capability to add, delete, modify, back up, and restore hosting files and directories
- Establishment of a secure connection between two different servers
- Import and export of your database
How to Configure SSH Keys in cPanel
To configure SSH keys in cPanel, you can either create a new key pair or import an existing key. Choose one of the two options below:
Option 1: Generating a New SSH Key
-
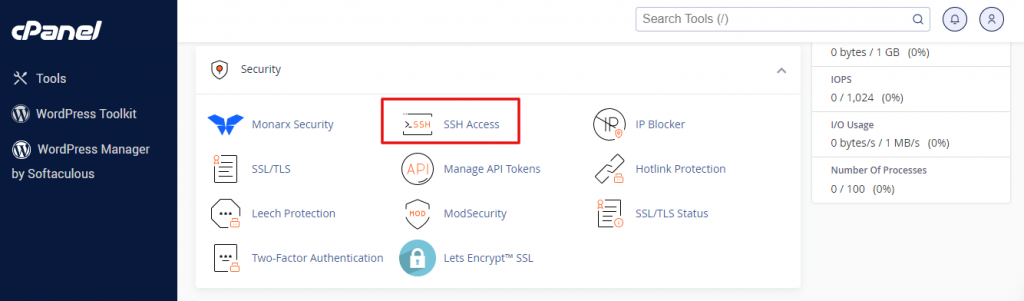
Step 1: Access SSH Management
Log in to your cPanel account and open the SSH Access tool.
If you are using the Jupiter theme, navigate to the Tools page, find the Security section, and click on SSH Access. For Paper Lantern theme users, simply click on SSH Access in the security section.
-
Step 2: Navigate to SSH Key Management
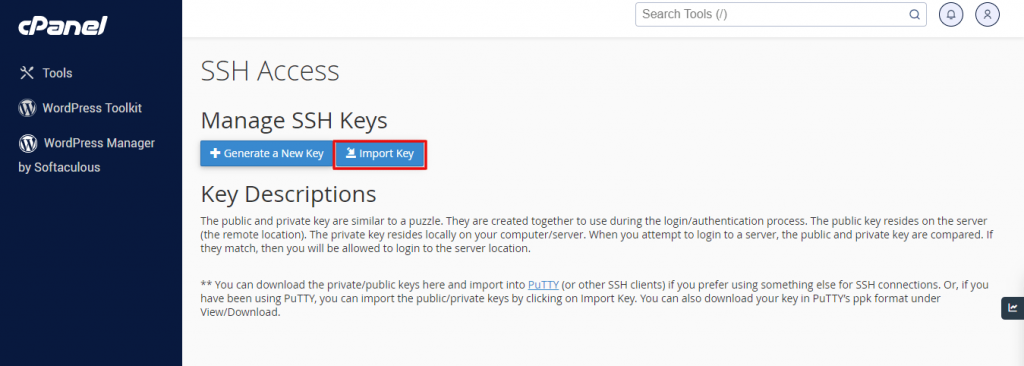
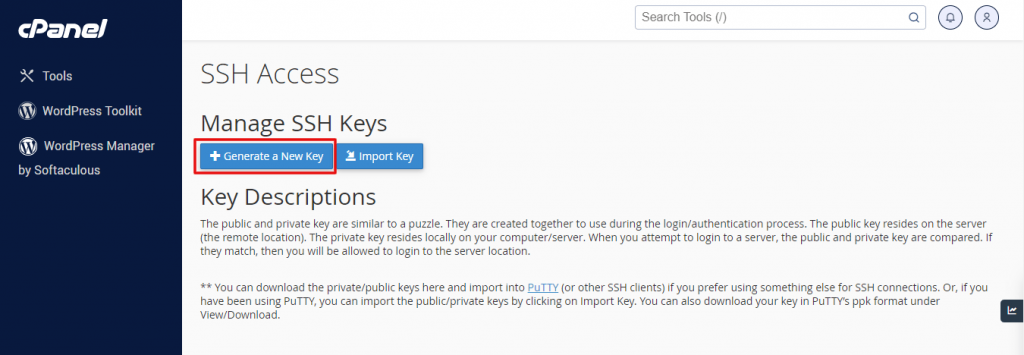
On the SSH Access page, click on Manage SSH Keys.
-
Step 3: Generate New Key
Click on Generate New Key.
-
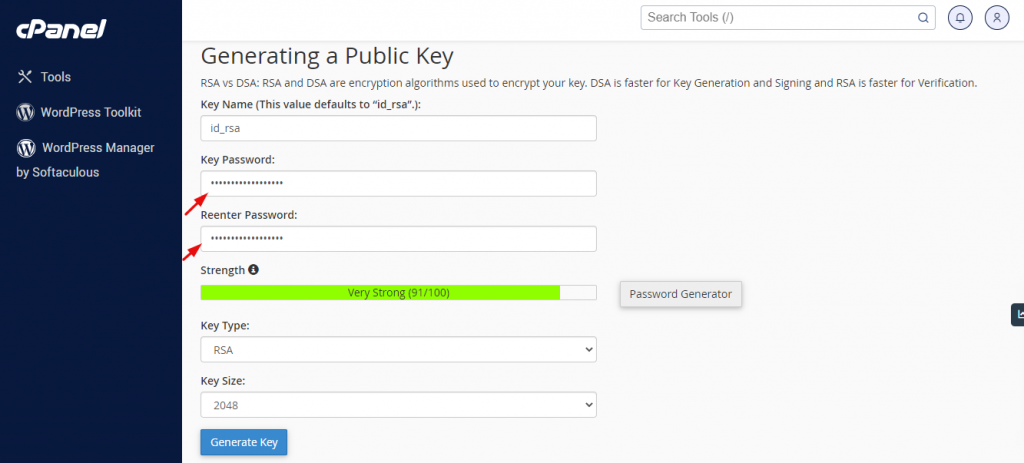
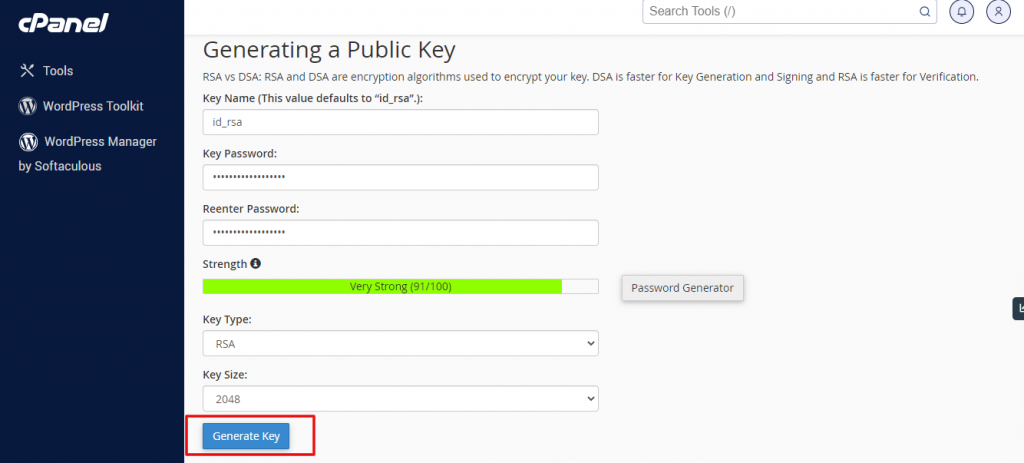
Step 4: Configure Key Settings
Verify the key name, which is set to
id_rsaby default. In the boxes labeled "Key Password" and "Reenter Password," enter the password for the key.Note: You can use the password generator to create a strong password.
The key type is configured as RSA and the encryption key has been configured to a size of 2048 bits.
-
Step 5: Generate the Key
Once all the settings are configured, click on Generate Key.
cPanel generates public and private keys and saves them in the
/home/username/.sshdirectory, where username is your account. -
Step 6: Authorize the Key
Click on Go Back. In the Public Keys section, locate the name of the generated key. Navigate to Actions > Manage.
Click on Authorize, then click Go Back. Your hosting account is now connected with the newly generated key.

Option 2: Importing an Existing Key
If you've previously generated SSH keys for your account and want to use them, cPanel allows for easy import.
-
Step 1: Access SSH Management
Log in to cPanel and navigate to the Security section, then click on SSH Access.
-
Step 2: Navigate to Key Management
On the SSH Access page, navigate to the "Manage SSH Keys" section and select Manage SSH Keys.
-
Step 3: Import Key
Click on Import Key.
-
Step 4: Enter Key Details
Enter the desired name for the key in the "Choose a name for this key" text box. Insert the public key into the designated text box that says "Paste the public key in the text box."
-
Step 5: Complete Import
Click Import to import the key, then navigate back to Manage Keys.
-
Step 6: Authorize the Imported Key
Find the imported key name under "Public keys". In the "Actions" section, click Manage.
Click Authorize and then select Go Back.