API tokens in cPanel provide password-free authentication for applications to access your server. Since cPanel version 80, you can create and manage API tokens to grant third-party developers or vendors access to API2 and UAPI functionality without sharing your password.
How to do it
-
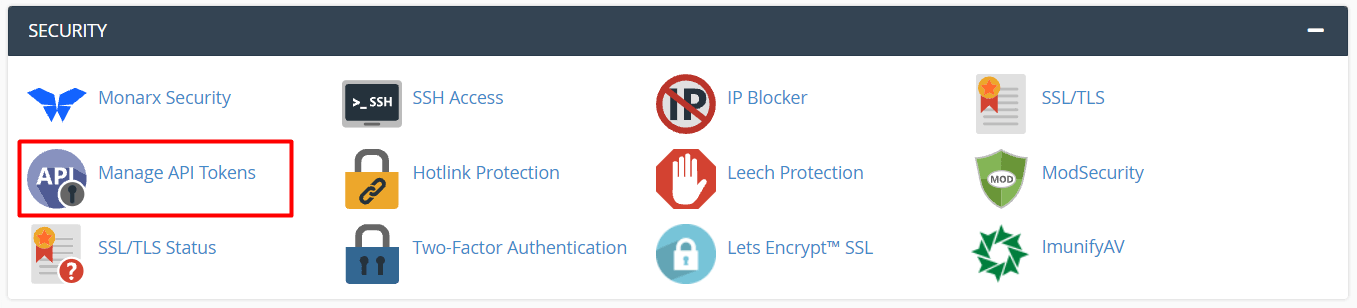
Step 1: Access the API Token Manager
Log in to your cPanel account.
Scroll to the SECURITY section and click Manage API Tokens.
-
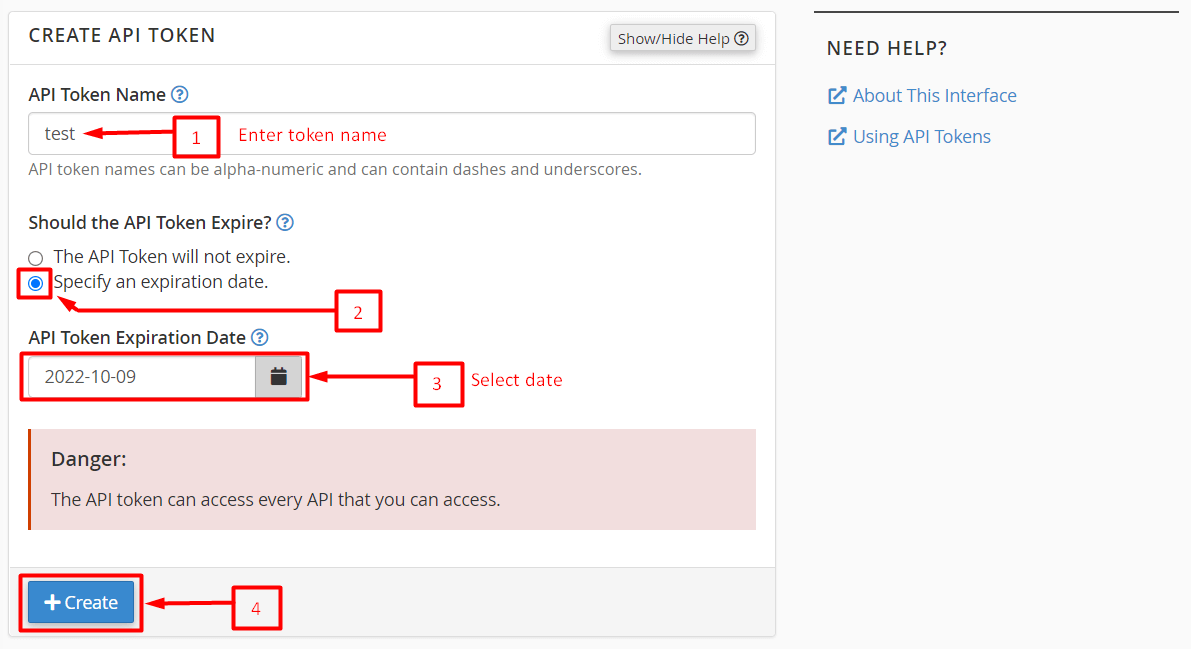
Step 2: Create a new API token
Enter the name of the API token in the API Token Name field.
Select the Specify an expiration date option.
In API Token Expiration Date, select the date from the calendar. The token will be valid until this date.
Click Create.
Note: While you can select The API Token will not expire option, we strongly recommend setting an expiration date for security reasons.
-
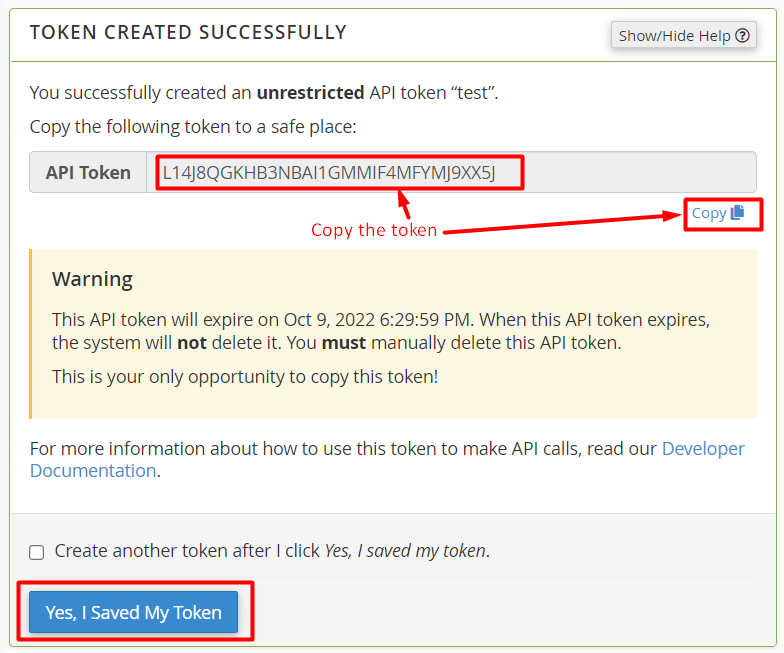
Step 3: Save the API token
A success message will be displayed when cPanel creates the new token.
Copy the API token to a secure location. You will need to share it with your user later.
Click Yes, I Saved My Token.
The API token you created now appears in the list of active API tokens.
-
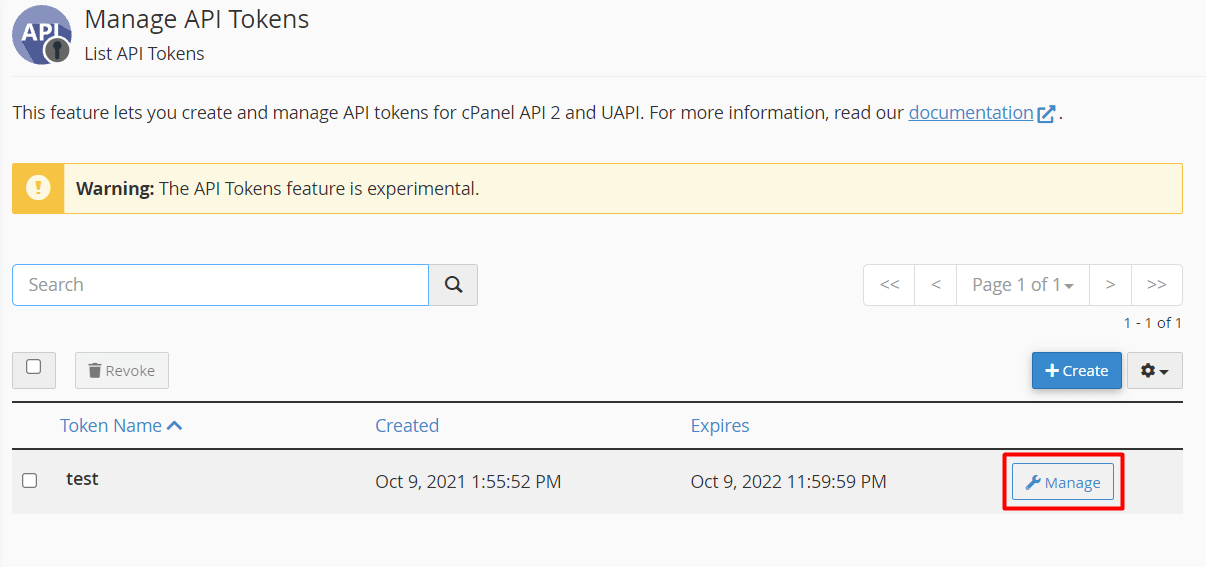
Step 4: Manage an existing API token
Click the Manage button for the API token you want to manage.
You will see two sections:
- MANAGE API TOKEN: Here you can change the name of the API token.
- REVOKE API TOKEN: Allows you to discard an API token.
-
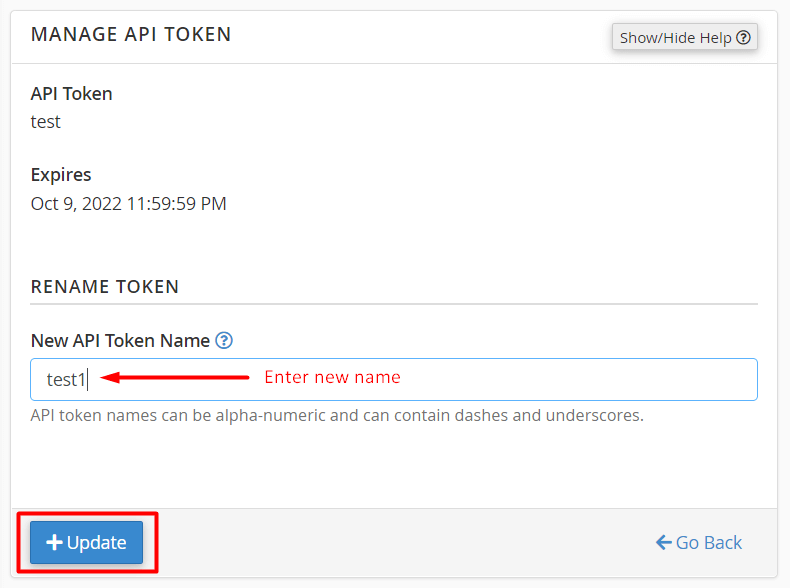
Step 5: Update the API token name (optional)
In the MANAGE API TOKEN section, enter the new name for the API token in the New API Token Name field.
Click the Update button.
The name of the API token will be modified to the new one you just updated.
-
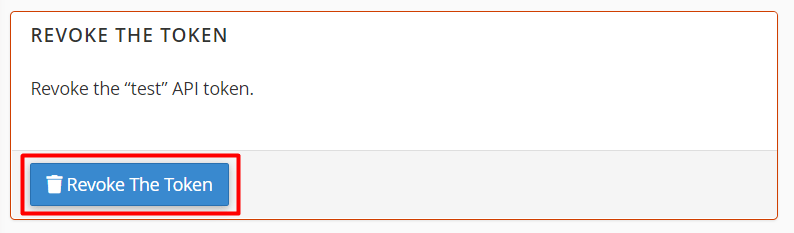
Step 6: Revoke an API token (optional)
In the REVOKE API TOKEN section, click Revoke The Token.
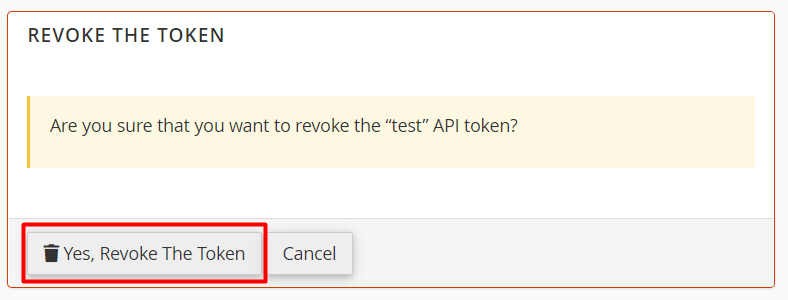
A confirmation message will appear.
Click Yes, Revoke The Token.
The system will invalidate the API token and remove it from the list of active tokens.