Memcached is a website caching technology that can significantly enhance performance and reduce page loading times for database-heavy websites. This guide walks you through enabling Memcached in cPanel and configuring it for WordPress sites using the LiteSpeed Cache plugin, as well as other web applications.
Background
Object caching involves storing database queries in memory. When activated on your WordPress site, it accelerates PHP execution times, reduces database load, and delivers content to visitors more quickly. This caching system is particularly beneficial for websites with substantial databases.
How to Set It Up
-
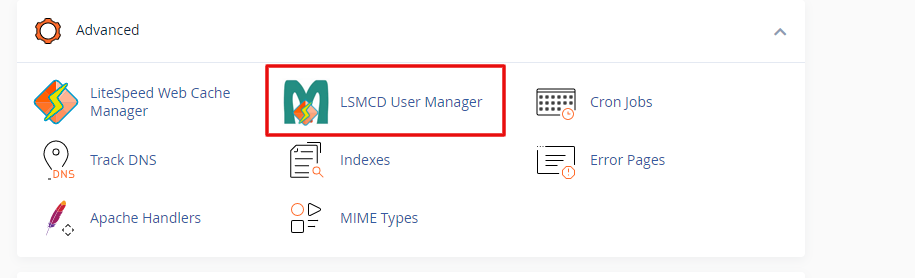
Step 1: Enable Memcached in cPanel
Log into your cPanel account and navigate to the Advanced section. Click on the LMSCD User Manager icon.
-
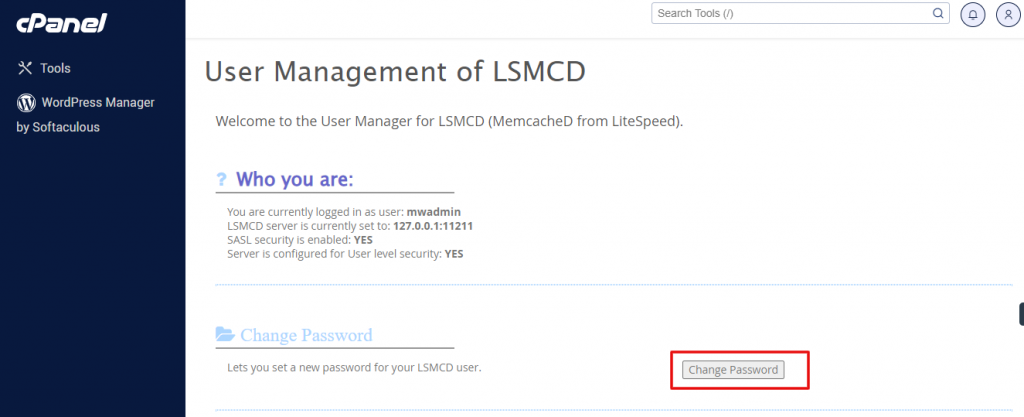
Step 2: Set LMSCD Password
Generate a password for your LMSCD username and click the Change Password button.
-
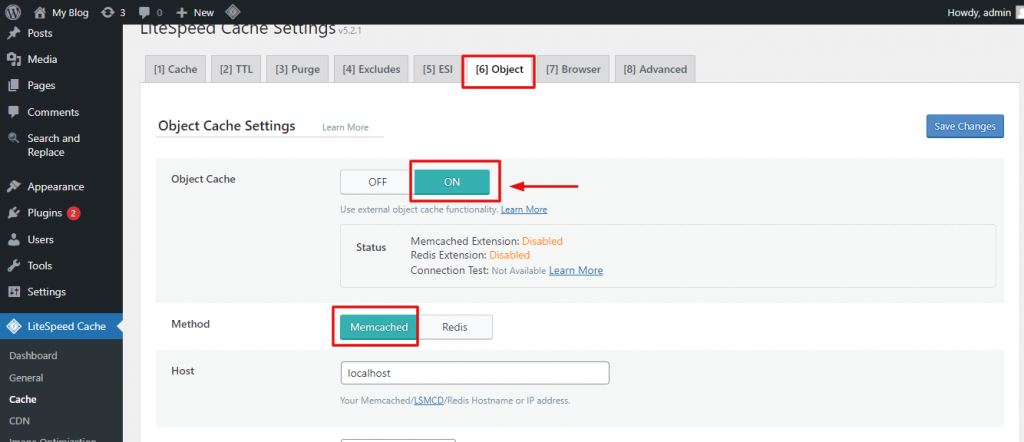
Step 3: Configure Object Cache in WordPress (LiteSpeed Cache Plugin)
If you're using WordPress with the LiteSpeed Cache plugin, access your WordPress dashboard and navigate to LiteSpeed Cache > Cache > Object.
Note: If the LiteSpeed Cache plugin is not installed, install and activate it first.
-
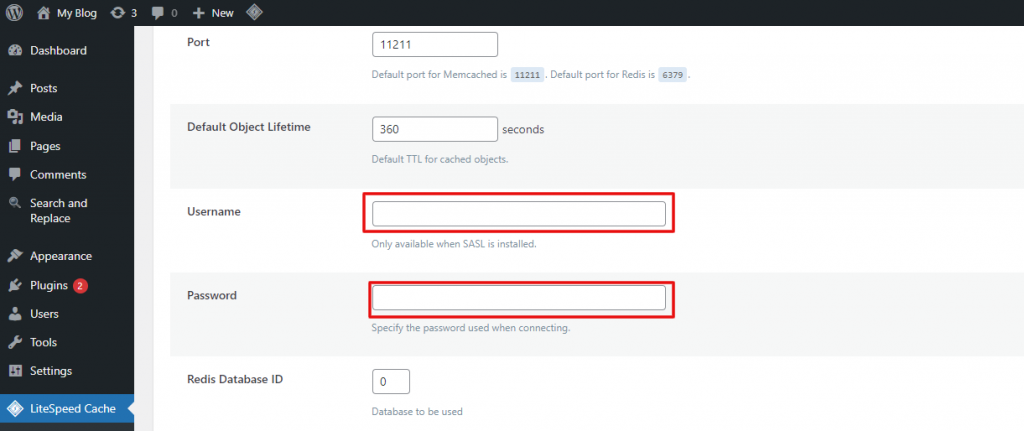
Step 4: Enter Credentials
Input the username and password you created in cPanel. Leave all other fields at their default settings.
Repeat this process for every WordPress installation that requires Memcached.
-
Step 5: Configure Memcached for Other Web Applications
If your website uses a different platform, configure Object Cache with these settings:
- Method: Memcached
- Host:
127.0.0.1 - Port:
11211 - Default Object Lifetime: 360 seconds
- Username: Your cPanel username
- Password: The password you set in cPanel for your LSMCD username