Switching your hosting control panel from cPanel to DirectAdmin is a straightforward process that involves creating a backup of your cPanel account and restoring it in DirectAdmin. This guide walks you through the complete transfer process, including how to convert backup files to the correct format and restore them using DirectAdmin's admin interface.
How to Do It
-
Step 1: Create a Full cPanel Account Backup
Perform a full account backup of your cPanel account. The backup file will have a format similar to:
backup-7.21.2021_08-50-40_USERNAME.tar.gzThe backup file's name includes your username, and the numbers indicate the date and time when cPanel generated the backup.
Alternatively, users with root access can generate a full backup through the command prompt by running:
/scripts/pkgacct USERNAMEAn archive file,
cpmove-USERNAME.tar.gz, will be created in the/home/directory. -
Step 2: Convert Backup to DirectAdmin Format (if needed)
Note: The filename format
cpmove-USERNAME.tar.gzis essential for DirectAdmin to successfully restore cPanel backups. If your backup is user-generated, it needs to be converted to this format.Use the following command:
for i in `ls backup-[0-9]*.*.tar.gz`; do { USERNAME=`echo $i | cut -d_ -f3 | cut -d'.' -f1`; mv -v $i cpmove-${USERNAME}.tar.gz; }; done -
Step 3: Upload Backup Files to DirectAdmin
Upload the converted backup files to the DirectAdmin panel, typically in the directory
/home/admin/cpanel_backups. -
Step 4: Access DirectAdmin Admin Backup/Transfer
Log in to your DirectAdmin admin account.
Navigate to the Admin Tools section and select "Admin Backup/Transfer".
-
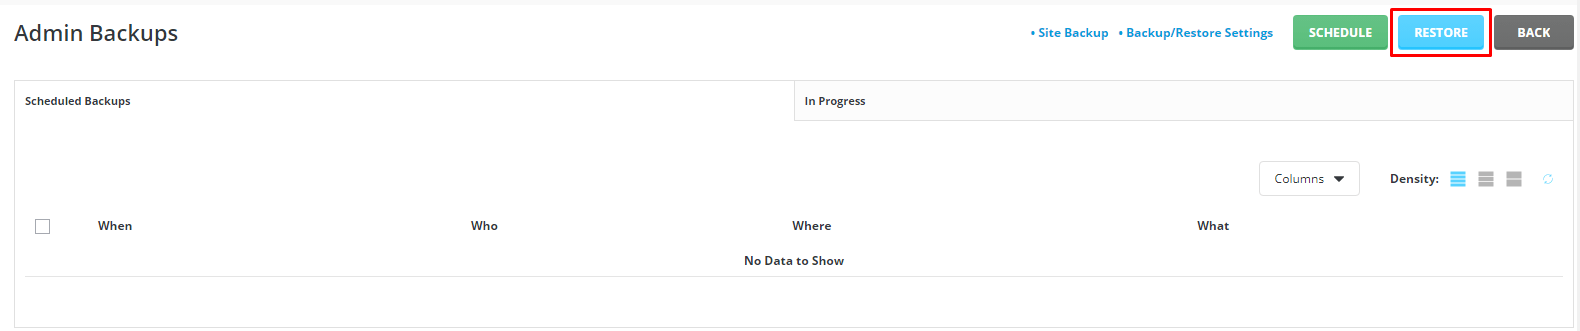
Step 5: Initiate Restore Process
Click the "RESTORE" button.
-
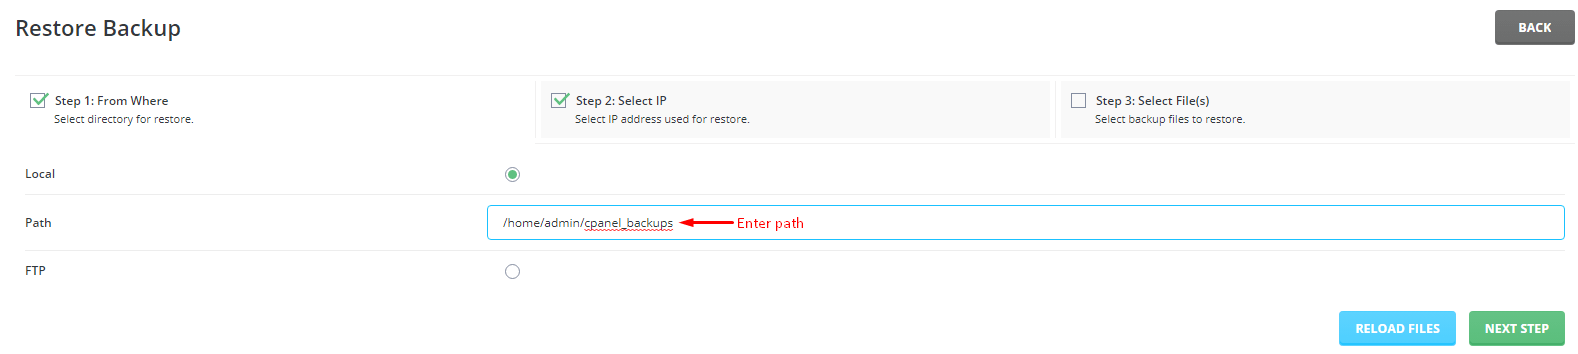
Step 6: Enter Backup File Path
Enter the path for the backup file.
-
Step 7: Navigate to Step 3
Click the "NEXT STEP" button until you reach Step 3.
-
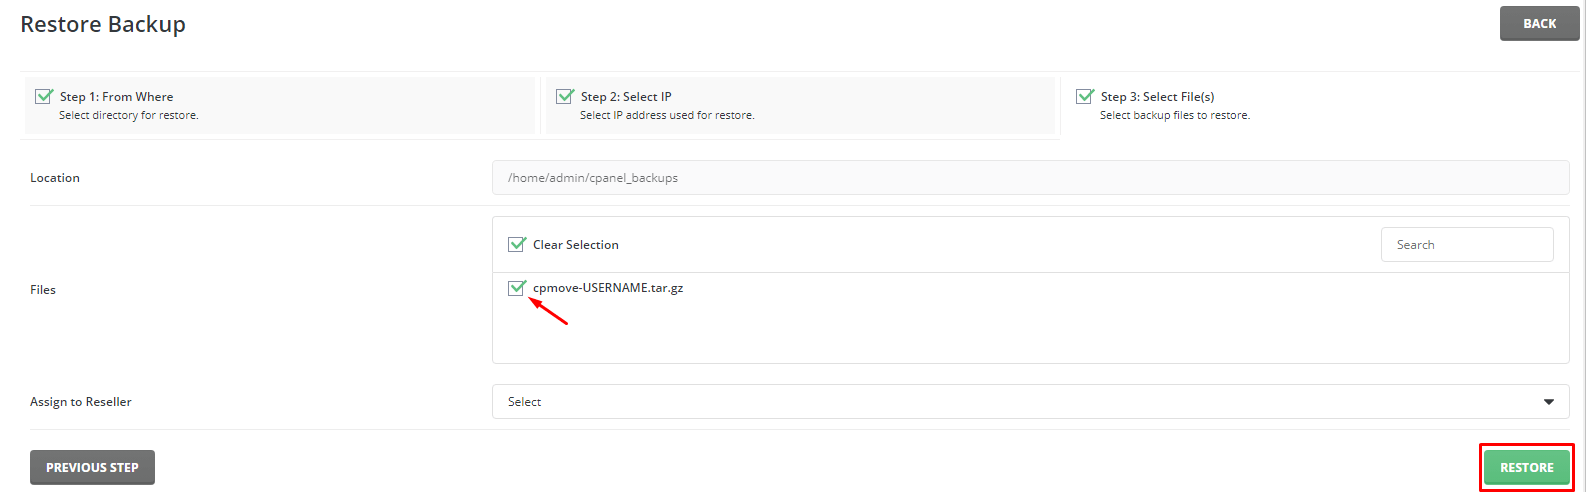
Step 8: Complete the Restore
Choose the backup file and click "RESTORE".
DirectAdmin will initiate the restoration process, ensuring a successful account transfer from cPanel.