This guide shows you how to restore backups in cPanel using JetBackup 5. JetBackup is a comprehensive backup and recovery tool that allows you to restore website files, databases, email accounts, and other data from previous backup points.
Background
JetBackup 5 is a tool within cPanel that provides backup and recovery solutions for your hosting account. It offers both remote and local incremental backup options, with off-site backups stored according to your hosting plan's retention policy.
JetBackup 5 can restore various types of data including:
- Files
- Databases
- Email Accounts
- DNS Zones
- SSL Certificates
- Cron Jobs
The most commonly used restore options are Files, Databases, and Email Accounts.
How to Restore a Full cPanel Account
-
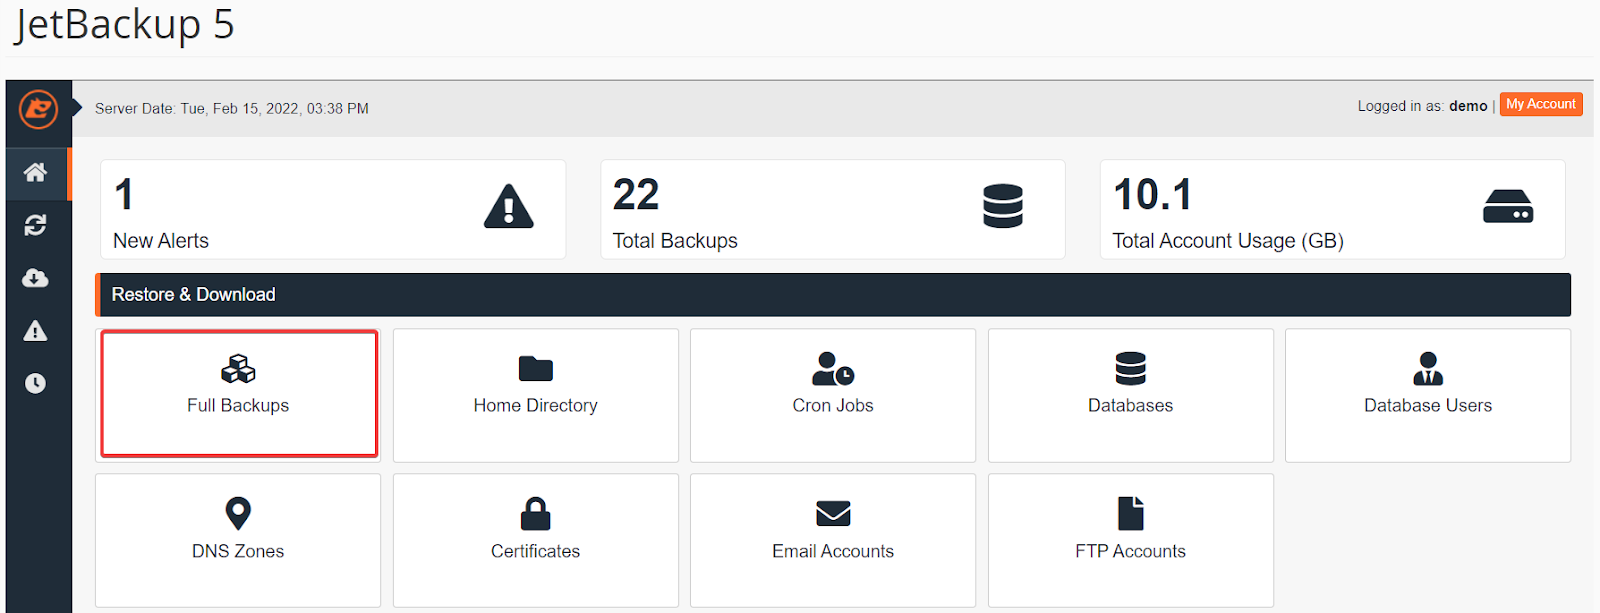
Step 1: Access JetBackup 5
Log in to your cPanel account, scroll down to the Files section, and click on JetBackup 5.
-
Step 2: Select Full Backups
In the "Restore & Download" section, select Full Backups.
-
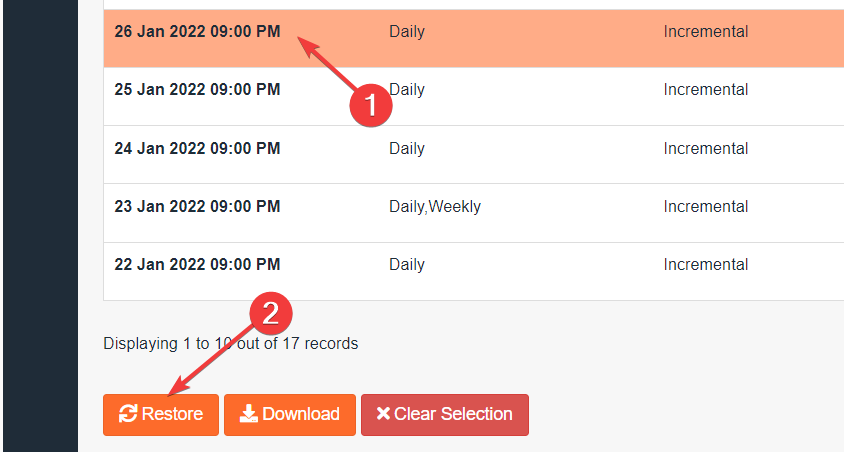
Step 3: Choose the Backup to Restore
Select the backup you wish to restore from the list (sorted by date), then click the Restore button.
-
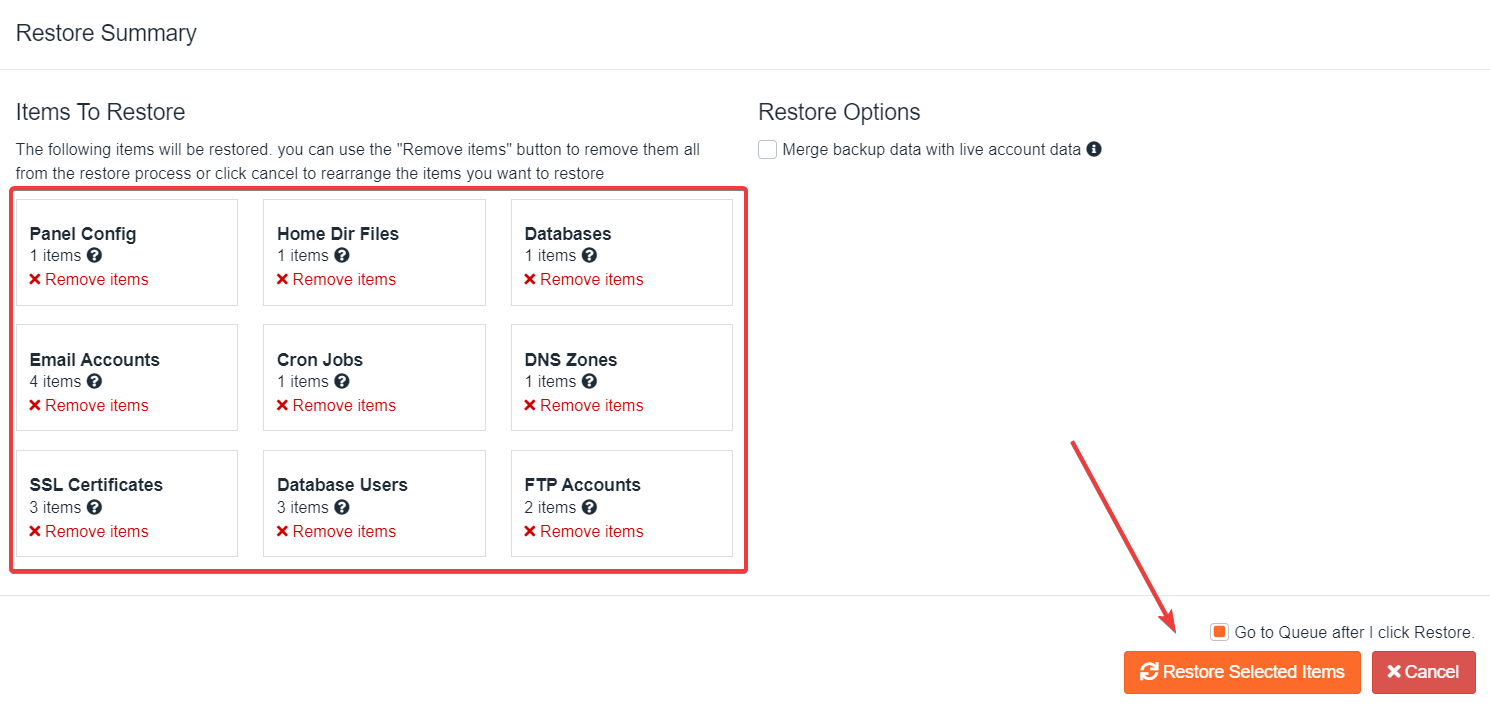
Step 4: Review and Confirm Restoration
On the Restore Summary screen, review the selected backups for restoration under "Items To Restore", then click Restore Selected Items.
-
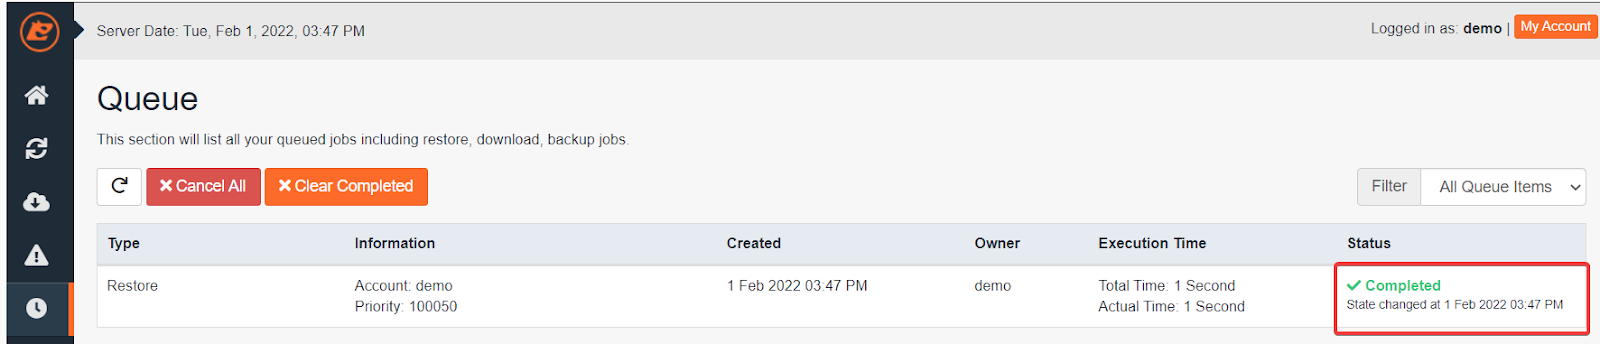
Step 5: Wait for Completion
Wait for the restoration job in the Queue to finish. The status will change to Completed once the restore process is finished.