This guide walks you through adding a new customer account in your Plesk Reseller Panel. By creating a customer account, you enable them to manage their own hosting services, domains, and subscriptions through their dedicated Customer Panel.
How to Add a Customer
-
Step 1: Access the Customers Section
Log in to your Plesk account and navigate to the left sidebar. Under Hosting Services, select Customers.
-
Step 2: Initiate Customer Creation
Click Add a Customer to begin creating a new customer account.
-
Step 3: Fill in Contact Information
Complete all required fields marked with an asterisk in the Contact Information section.
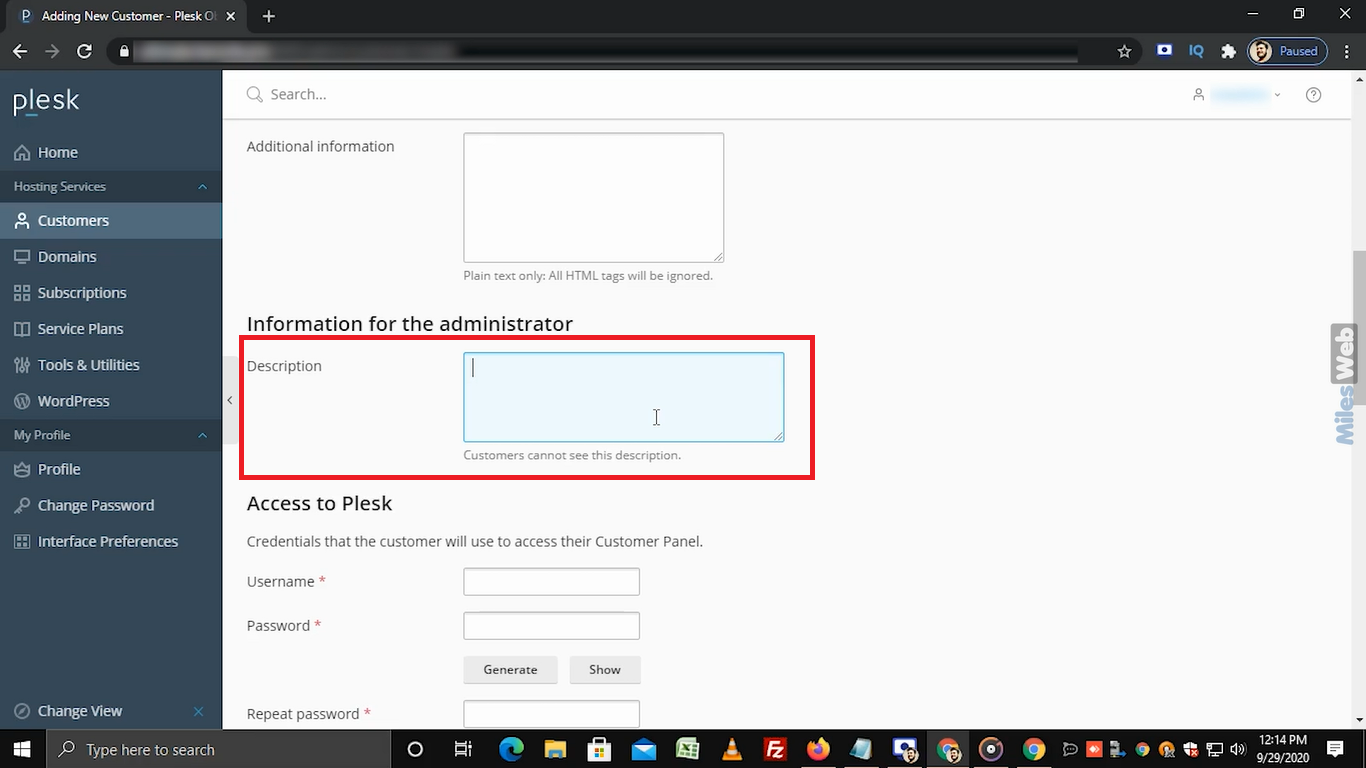
In the Information for the administrator section, you can add an internal description in the provided textbox. Note that customers cannot view this description.
-
Step 4: Configure Plesk Access Credentials
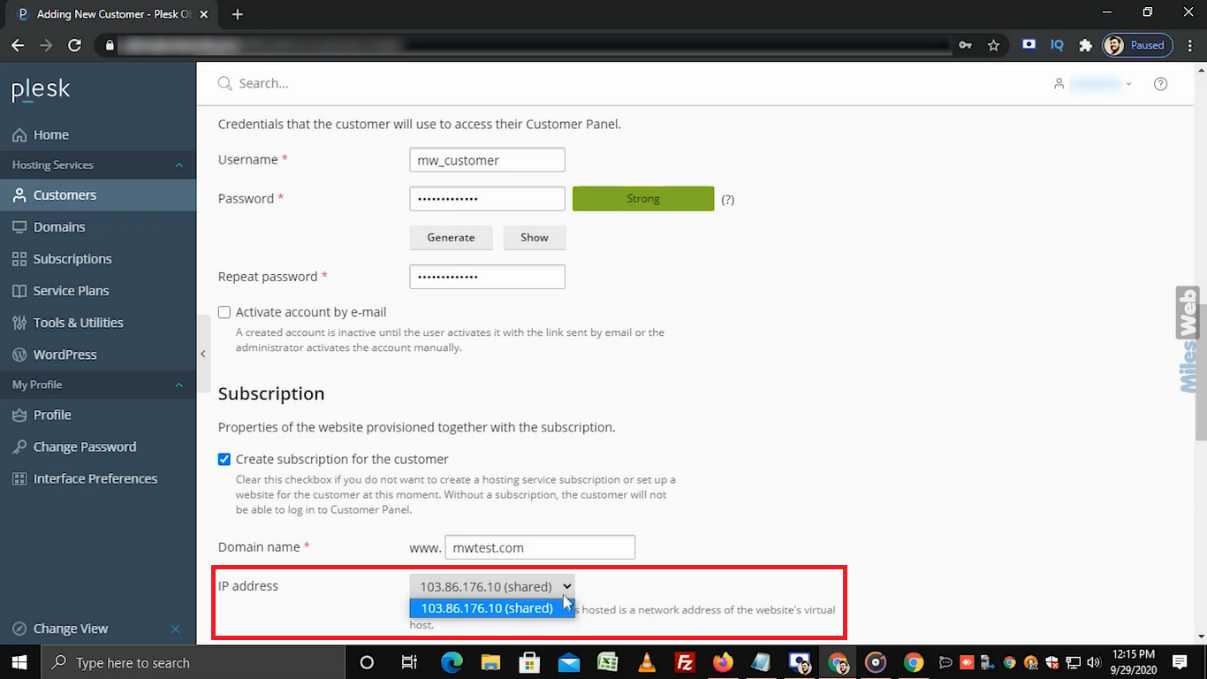
In the Access to Plesk section, enter the desired username and password. Re-enter the same password in the Repeat password field, ensuring it is alphanumeric. Alternatively, click Generate for an auto-generated password.
The customer will use these credentials to access their Customer Panel.
Select the checkbox if you wish to send an activation link to the customer via email.
-
Step 5: Set Up the Subscription
In the Subscription section, the checkbox is selected by default. If deselected, the customer will be unable to log in to the Customer Panel.
Enter the customer's domain name in the Domain name field. The default IP address will be displayed in this section.
-
Step 6: Configure Subscription Credentials
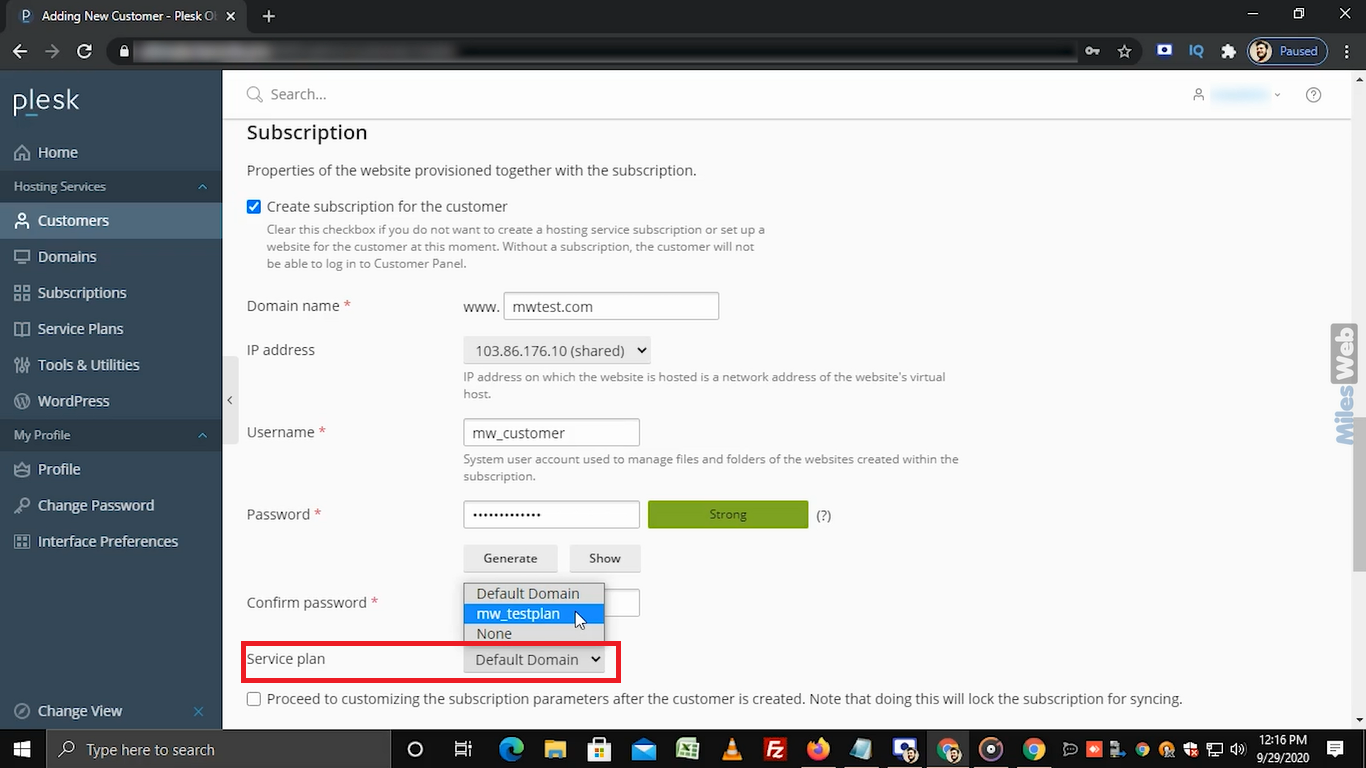
Enter the same username and password as specified in the Access to Plesk section. Confirm by re-entering the password in the Confirm password field.
Select the service plan from the dropdown menu. Choose an existing service plan that matches the customer's requirements.
-
Step 7: Avoid Locking the Subscription
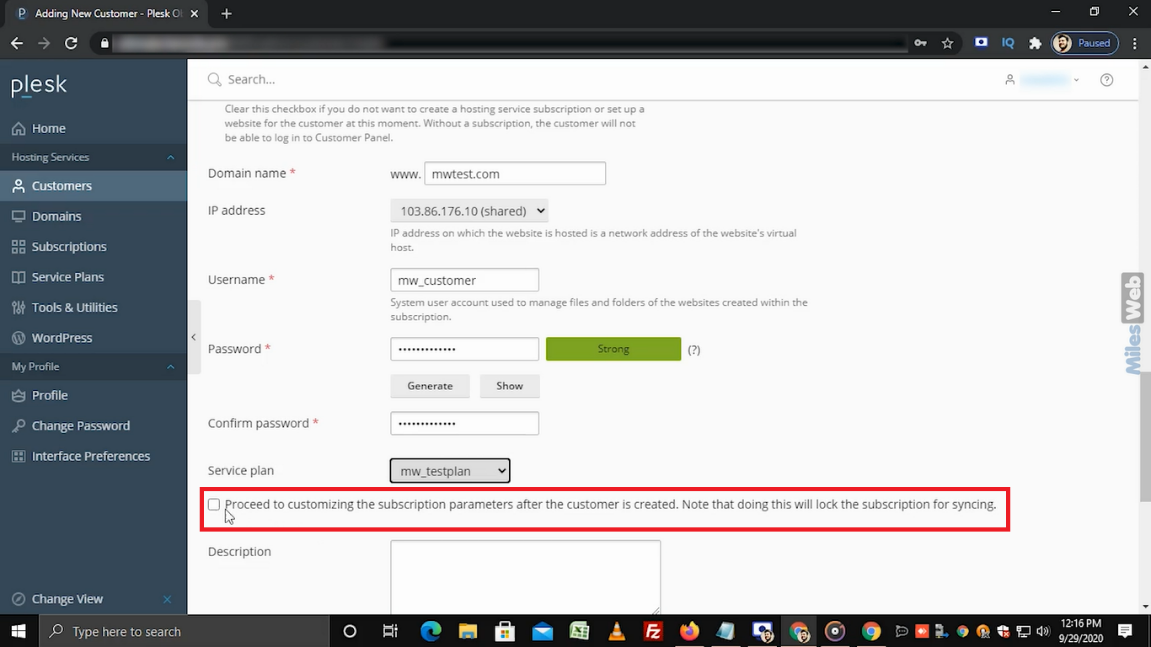
Do not select the checkbox for locking the subscription, as this will prevent the subscription from syncing.
-
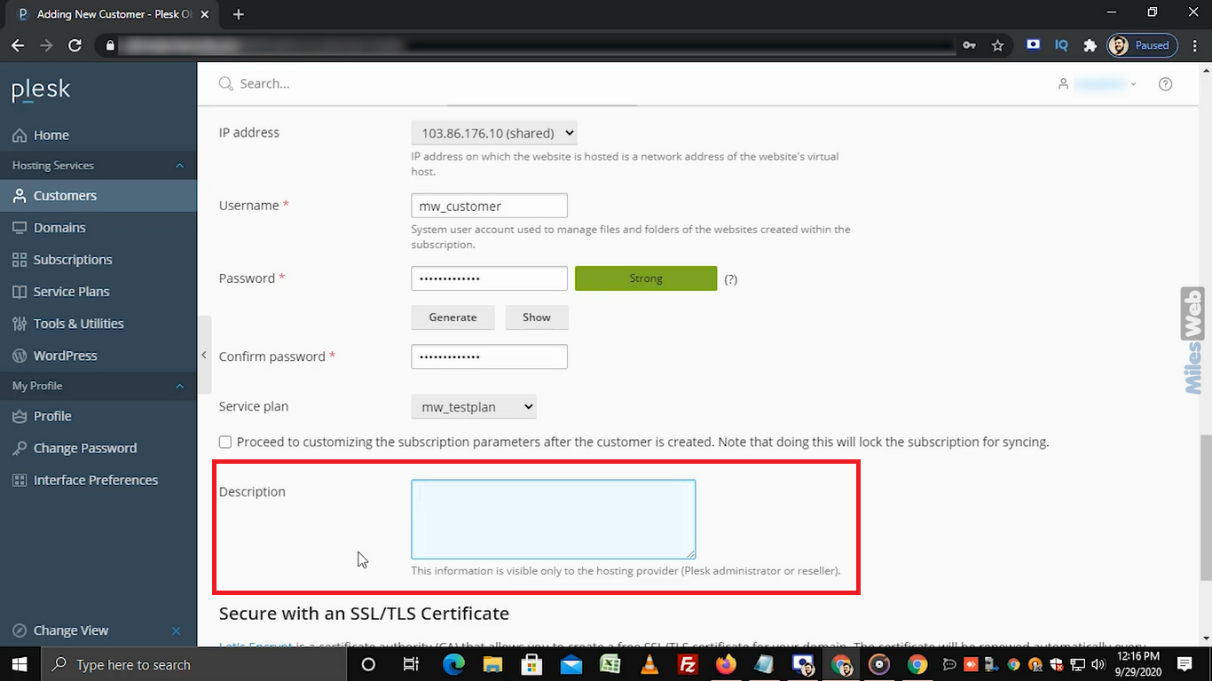
Step 8: Add Optional Description
If you wish to include any internal notes, enter them in the description textbox. This information is only visible to the Plesk administrator or reseller.
-
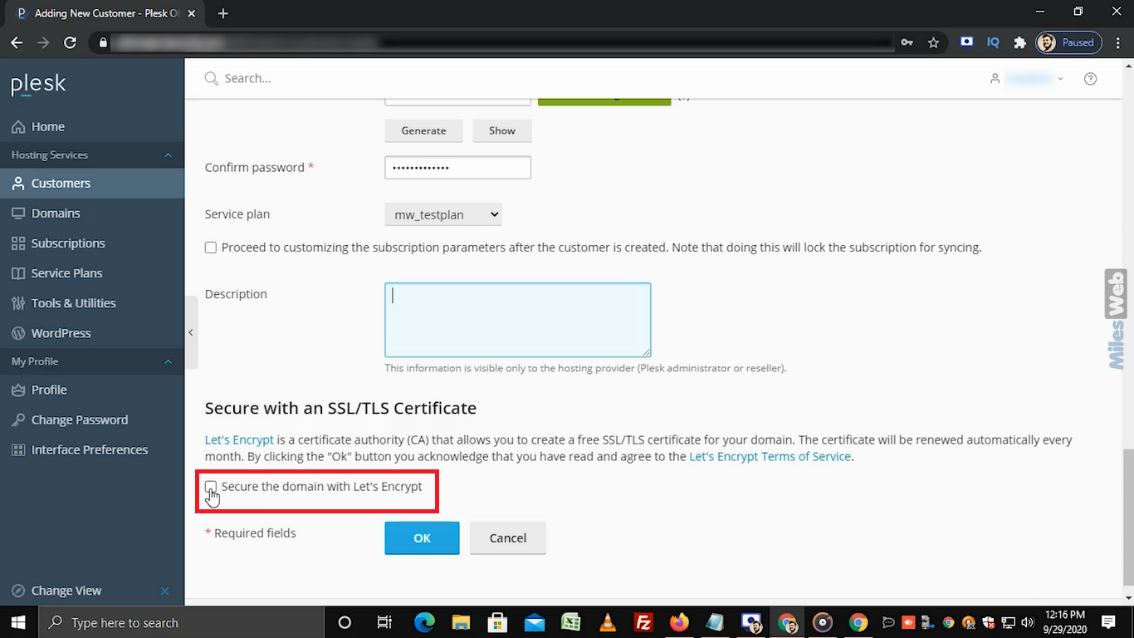
Step 9: Configure SSL Certificate (Optional)
To secure the domain with a free SSL certificate, select the Let's Encrypt SSL checkbox. Ensure your domain is correctly pointing to the server before proceeding. You can install the Let's Encrypt SSL certificate after adding the customer to Plesk.
-
Step 10: Complete the Process
Click OK to finalize and create the customer account.
The customer account is now created and ready to use. The customer can log in to their Customer Panel using the credentials you configured.