File and folder permissions control who can read, write, or execute files on your server. In Plesk, you can easily modify these permissions through the File Manager to ensure proper security and functionality for your website files. Properly setting permissions is crucial to maintaining the security of your website and preventing unauthorized access.
How to Do It
-
Step 1: Log in to Plesk
Access your Plesk control panel using your credentials. Enter your username and password in the login fields provided on the Plesk login page and click "Sign In." If you have two-factor authentication enabled, you will also need to provide a second form of verification.
-
Step 2: Open File Manager
Navigate to the File Manager from the main dashboard. Once logged in, locate the "Tools & Settings" section on the left-hand menu and click on it. Scroll down to find the "File Manager" option and click on it to open.
-
Step 3: Select the File or Folder
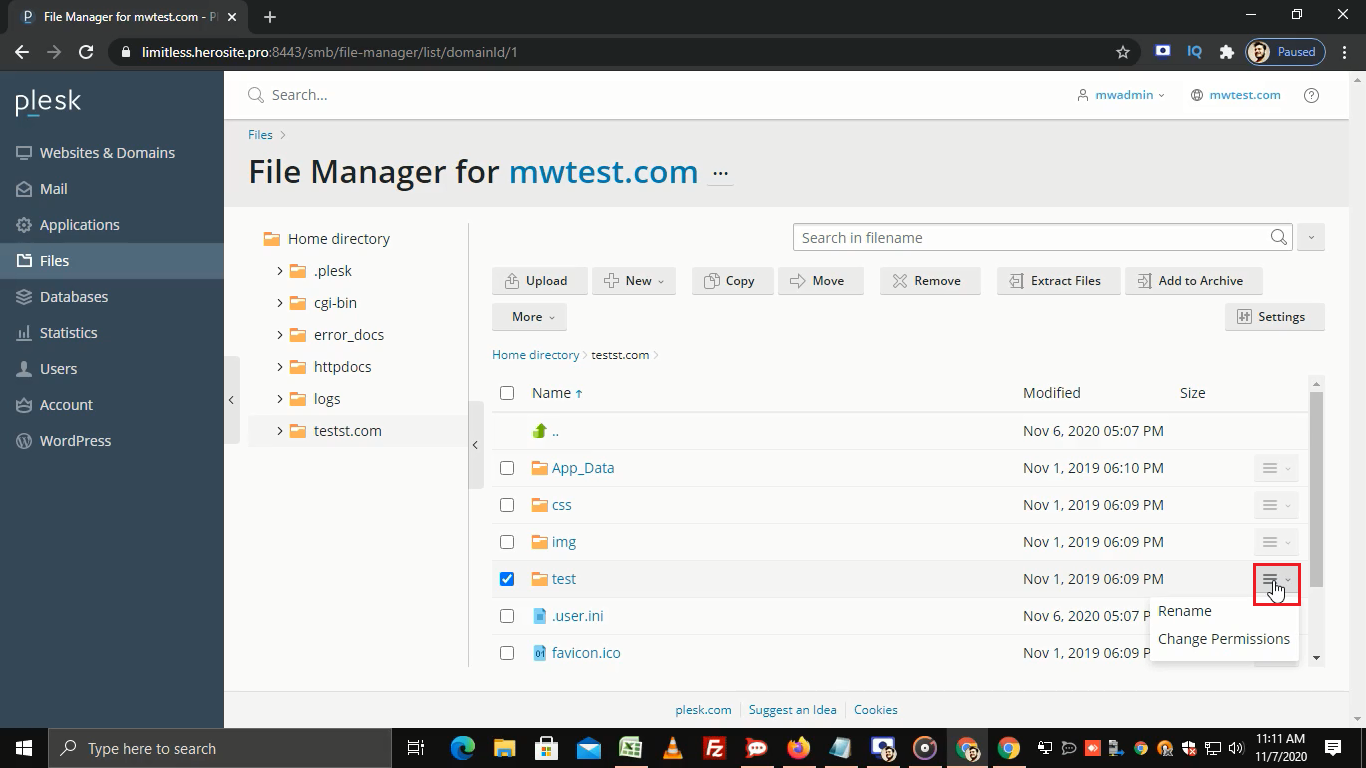
Locate and select the file or folder for which you want to assign or modify permissions. Use the navigation pane on the left side of the File Manager to browse through your directories. Click on a file or folder to highlight it, or use the checkboxes next to each item to make multiple selections.
-
Step 4: Change Permissions
Click the dropdown menu next to the selected file or folder and choose "Change Permissions." This action will open a dialog box where you can modify the permissions settings. Alternatively, you can right-click on the file or folder and select "Change Permissions" from the context menu.
-
Step 5: Set and Confirm Permissions
Configure the desired permissions for owner, group, and others. The permission settings are divided into three categories: Read (R), Write (W), and Execute (X). Check the boxes next to each permission type for the respective user groups (Owner, Group, Others) to grant them access. For example, if you want the file owner to have full control but only read access for others, check all boxes under Owner and only the Read box under Others.
After setting your desired permissions, click OK to apply the changes. It's important to understand that changing permissions can affect how your website functions, so it's a good idea to double-check your settings before confirming them.
-
Step 6: Verify Success
You will receive a success message confirming that the permissions have been updated. Once the changes are applied, you can verify them by checking the file or folder properties in the File Manager. The new permission settings should be displayed next to the item.
Tips:
- For security reasons, it's generally recommended to set permissions as restrictively as possible while still allowing your website to function properly.
- If you're unsure about the appropriate permissions for a specific file or folder, consult with your hosting provider or a web developer for guidance.
- Regularly reviewing and updating your file permissions can help protect your website from security vulnerabilities.