This guide shows you how to establish a remote connection to your Microsoft SQL Server database using SQL Server Management Studio (SSMS). You'll configure the connection settings and authenticate using SQL Server credentials to access your database remotely. Before proceeding, ensure that remote connections are enabled on your SQL Server instance and that your firewall allows traffic through the necessary ports, typically port 1433 for default instances.
How to Connect
-
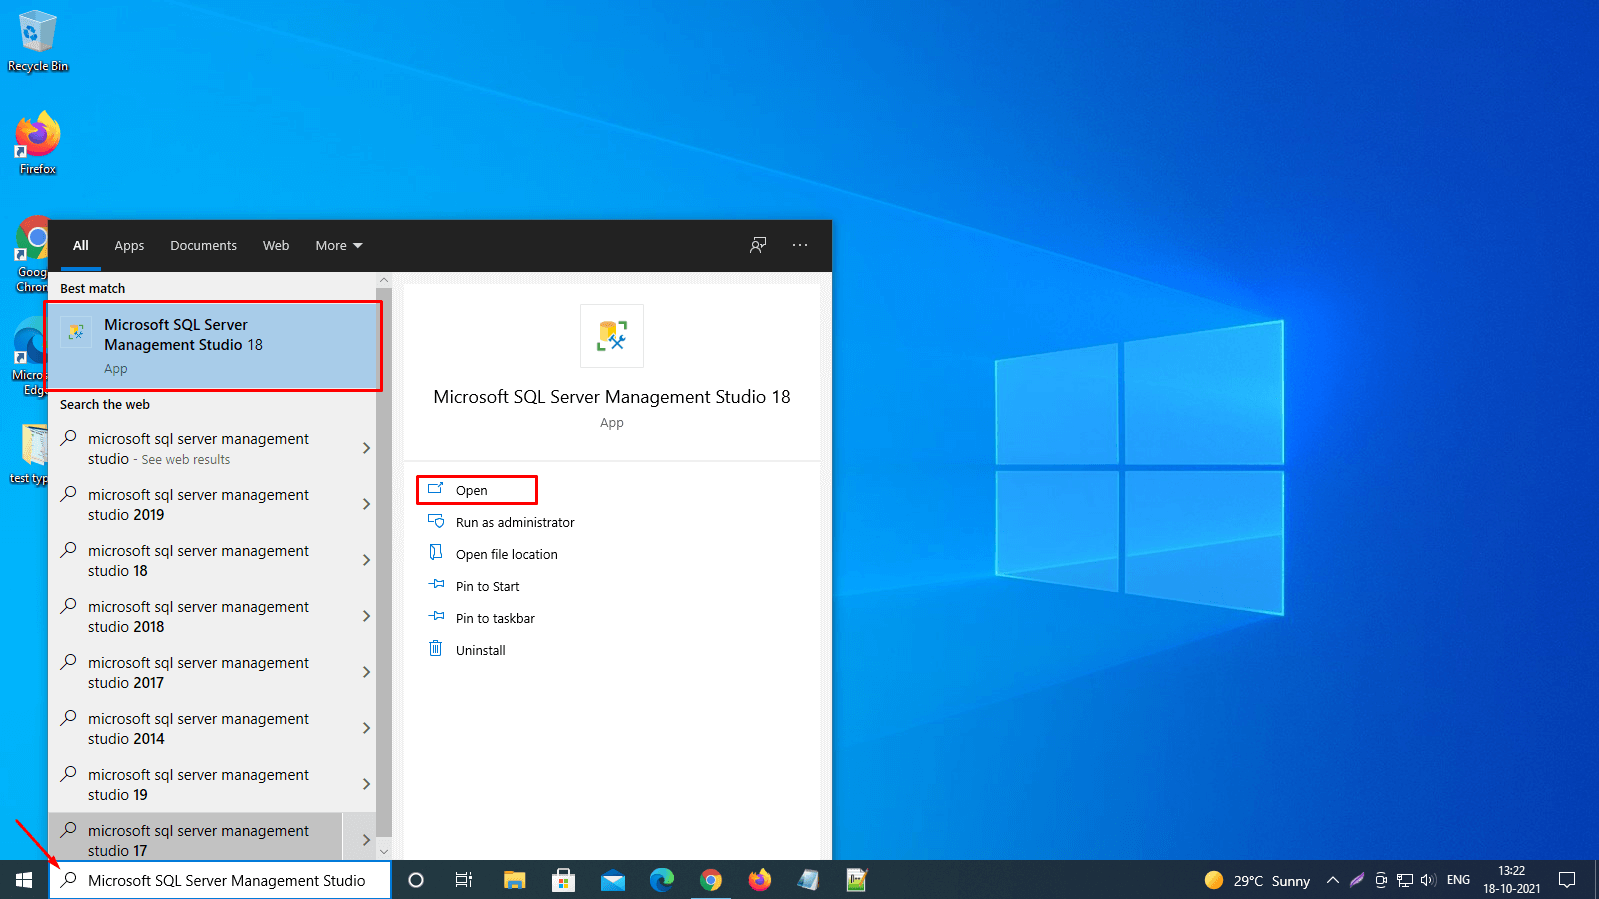
Step 1: Launch SQL Server Management Studio
Open Microsoft SQL Server Management Studio on your computer. If you haven't installed it yet, download and install the latest version from the official Microsoft website.
-
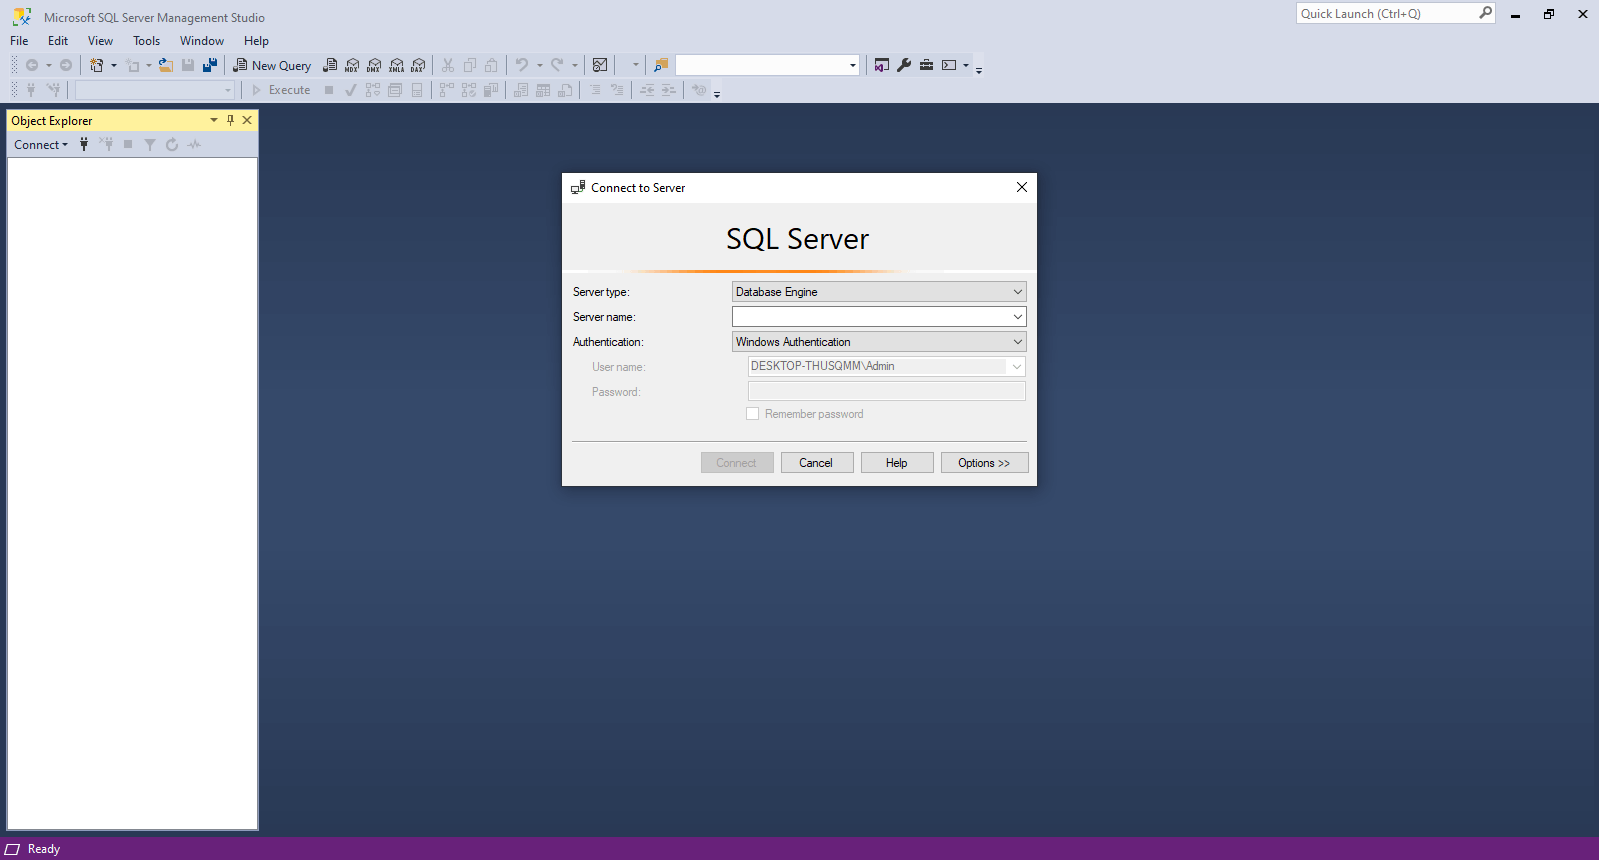
Step 2: Open the Connect to Server Dialog
The "Connect to Server" dialog box will appear on the screen. If it does not automatically open, you can manually launch it by selecting "File" from the top menu and then choosing "Connect Object Explorer..."
-
Step 3: Configure Connection Settings
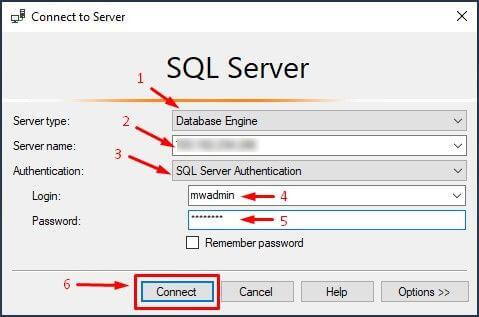
Fill in the connection details:
- In the Server type list box, choose "Database Engine." This is the default option and is used for connecting to a SQL Server instance.
- In the Server name text box, input the server name or IP address. If you're unsure of your server's IP address, contact your database administrator or hosting provider.
- In the Authentication list box, opt for "SQL Server Authentication." This method requires a username and password to authenticate.
- In the Login text box, enter the Microsoft SQL database username. Ensure you have the correct permissions to access the database.
- In the Password text box, provide the password associated with the login. Be cautious when entering your password and avoid sharing it with others.
- To avoid re-entering the password with each connection, select the "Remember password" checkbox. However, be aware that this may store your credentials in an insecure manner on your local machine.
-
Step 4: Connect to the Database
Click on "Connect" to establish the connection. If you encounter any issues, double-check your server name, authentication details, and ensure that remote connections are enabled.
-
Step 5: Verify Connection
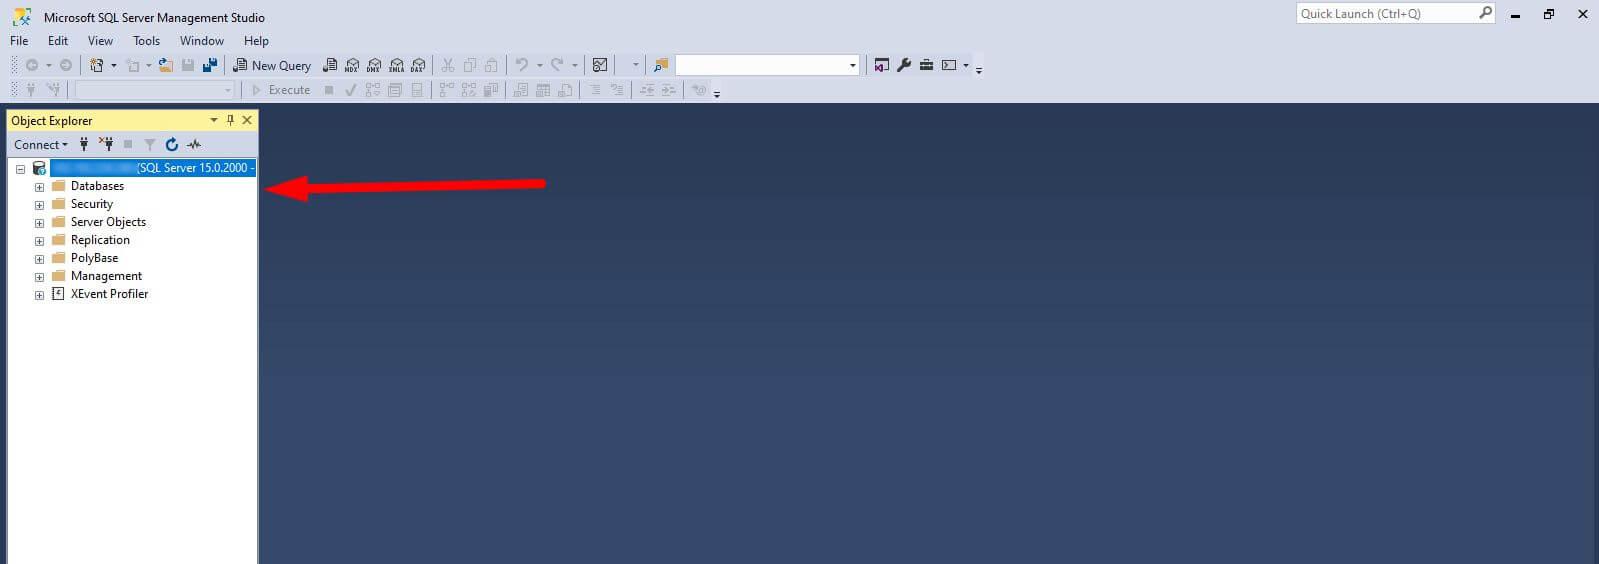
The database will be visible in the Object Explorer window, confirming a successful connection. You can now explore your databases, execute queries, and manage your SQL Server instance remotely.
Tips:
- Ensure that your SQL Server instance is configured to allow remote connections. This can be done through the SQL Server Configuration Manager.
- Check your firewall settings and ensure that port 1433 (or any other port you are using) is open for outbound traffic from your client machine and inbound traffic on the server.
- Consider using a VPN or SSH tunnel to secure your connection, especially if you're connecting over public networks.