This guide shows you how to delete a MySQL database from your DirectAdmin control panel. Before proceeding, it's advisable to create a backup of your database to prevent data loss. You can easily back up your database by navigating to the MySQL Management section, selecting the desired database, and clicking on the "Backup" button. This will generate a downloadable SQL file containing all your database information.
How to Delete a MySQL Database
-
Step 1: Log in to DirectAdmin
Sign in to your DirectAdmin account using your username and password. If you're unsure of your login credentials, you can retrieve them from your hosting provider or check the email sent during your account setup.
-
Step 2: Open MySQL Management
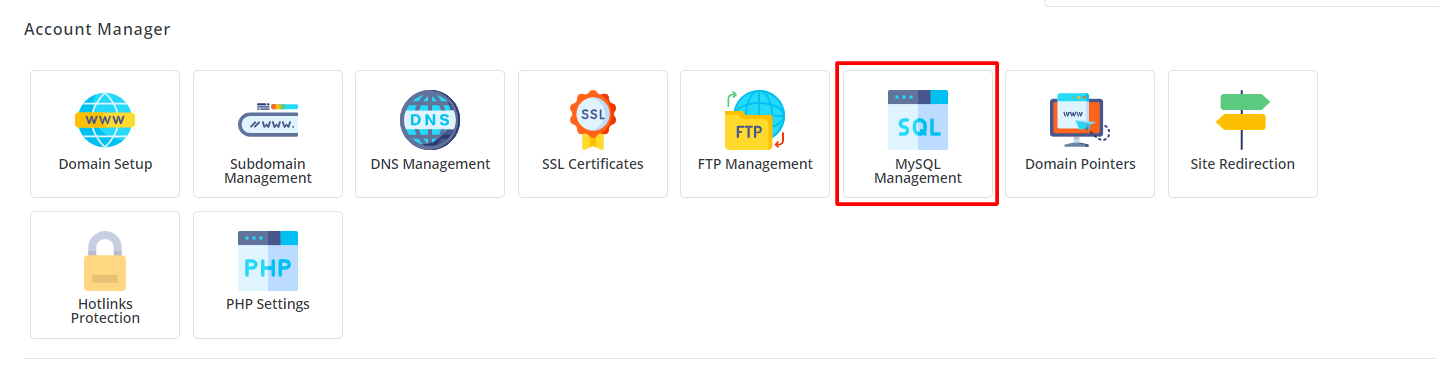
In the Account Manager section, select the MySQL Management icon or enter "MySQL Management" in the Navigation Filter box. Click on the displayed option to proceed.
-
Step 3: Select the Database
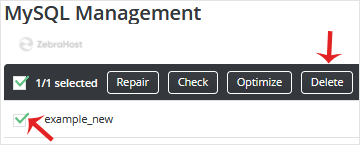
In the "Database" section, choose the database you want to delete. You can also select multiple databases if needed by checking the boxes next to each one. Be cautious when selecting multiple databases as they will all be deleted simultaneously.
-
Step 4: Delete the Database
Press the Delete button. A confirmation window will appear; click Delete again to proceed and remove the database. This action is irreversible, so ensure you have backed up any important data before proceeding.
The database will be deleted.

Tip: If you need to delete a user associated with the database, you can do so by navigating to the "MySQL Users" section in DirectAdmin. Select the user and click on the "Delete" button to remove it. Always ensure that no active applications are using the database or user before deletion.
If you encounter any issues during the deletion process, contact your hosting provider's support team for assistance. They can provide guidance specific to your account setup and help resolve any problems you might face.