PHPMyAdmin enables users to modify MySQL and MariaDB databases through a web interface. This guide shows how to safely remove columns from a database table using phpMyAdmin, which is available in cPanel, Plesk, and DirectAdmin control panels.
Before You Begin
Important: Always create a database backup before dropping columns. This action permanently deletes the column and all its data, and cannot be undone.
How to Drop Columns
-
Step 1: Access phpMyAdmin
Log in to your control panel account (cPanel, DirectAdmin, or Plesk) and locate phpMyAdmin in the database tools section.
-
Step 2: Select Your Database
When the phpMyAdmin window opens, choose the database you want to modify from the list on the left side.
-
Step 3: Navigate to the Table
Expand the table by clicking on the '+' icon next to it to reveal the available columns. Then access the Columns option to see a panel displaying all columns and their associated functions.
-
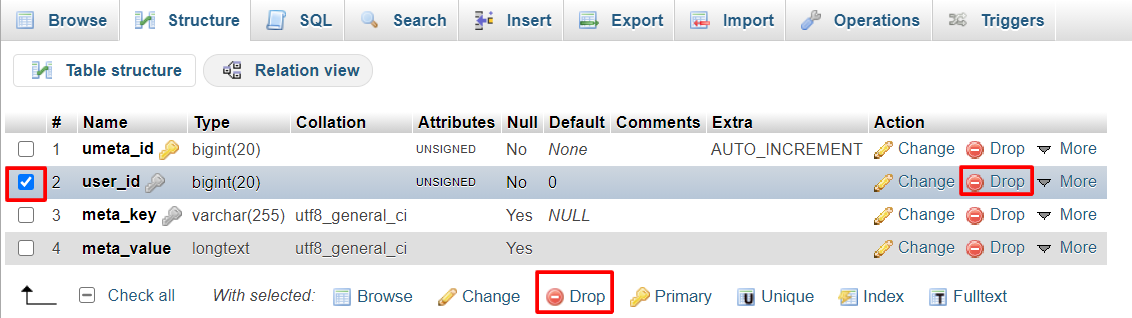
Step 4: Select and Drop the Column
Select the checkbox next to the column you want to delete, then click on the "Drop" option.
Warning: The Drop function irreversibly erases the column and its data from your database. Ensure this action won't impact your database, as the data will be unrecoverable.
-
Step 5: Confirm the Deletion
A pop-up window will display the column details to be dropped. After you've double-checked the information, click OK to proceed.
PHPMyAdmin will permanently remove the column from the table.