Creating a database in Webuzo is a straightforward process that allows you to set up MySQL databases for your web applications. This guide walks you through the complete process of creating a new database, configuring user access, and setting appropriate permissions in the Webuzo control panel.
How to Create a Database
-
Step 1: Log in to Webuzo
Open your web browser and navigate to the Webuzo control panel login page. Enter your username and password to access your account.
-
Step 2: Navigate to MySQL Database Section
Once logged in, locate the "MySQL Manager" or "MySQL Database" section in the control panel. The exact label may vary depending on your Webuzo version.
-
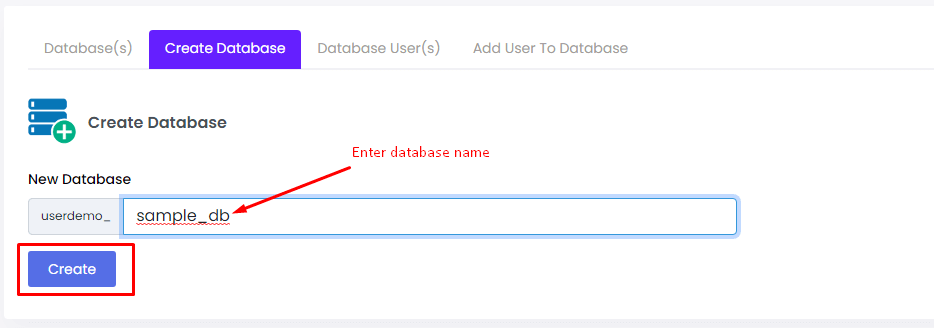
Step 3: Create a New Database
Within the MySQL Database section, find the option to create a new database. This may be labeled as "Create Database," "Add Database," or similar. Click on the corresponding button or link.
-
Step 4: Enter Database Information
You'll be prompted to provide information for the new database:
- Database Name: Enter a unique name for your new database.
- Username: Create a username for database access.
- Password: Set a secure password for the database user.
-
Step 5: Assign Permissions
Define the permissions or privileges for the user associated with the database. Specify permissions such as "SELECT," "INSERT," "UPDATE," and "DELETE" based on your application's requirements.
-
Step 6: Complete the Process
After entering the required information and configuring permissions, click the button to finalize the creation of the database.
-
Step 7: Verify Creation
Confirm the successful creation of the database by checking for a confirmation message. You should also see the new database listed in the MySQL Database section.