Adding IP addresses in WHM allows you to assign dedicated IPs to specific accounts or services on your server. This guide walks you through the process of adding a new IP address or IP range through the WHM interface.
How to Add a New IP Address
-
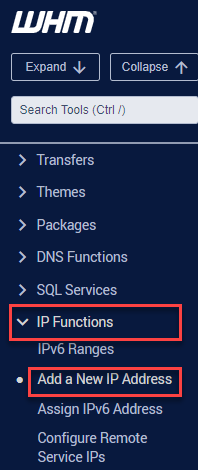
Step 1: Access the IP Functions section
Log in to WHM and navigate to the "IP Functions" section. Select "Add a new IP address" from the available options.
-
Step 2: Enter the IP address details
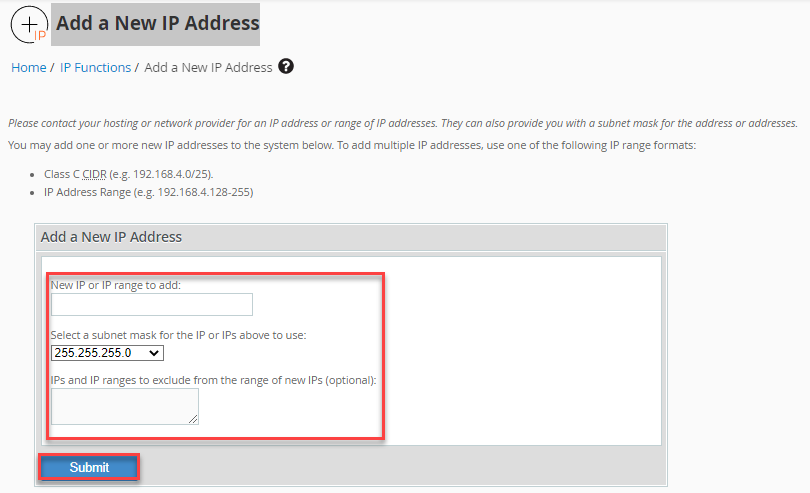
In the "New IP or IP range to add" field, input the desired IP addresses you want to add to your server.
-
Step 3: Select the subnet mask
Use the drop-down menu to choose the appropriate subnet mask for the specified IP address or IP range.
-
Step 4: Exclude specific IPs (optional)
If you need to exclude specific IP addresses from the new range, enter them in the "IPs and IP ranges to exclude from the range of new IPs" text box. This field is optional.
-
Step 5: Submit the configuration
Click the "Submit" button to add the new IP address to your server.
Note: The system automatically attempts to create an alias for the newly added IP address within the main network. This process involves reconstructing the IP address pool located in the
/etc/ipaddrpoolfile, with IP addresses being stored in the/etc/ipsfile. The activation of IP addresses occurs when the server initiates the ipaliases service.