Custom error pages allow you to redirect users to branded HTML pages when they encounter errors like 404 (page not found) or 500 (server error). This guide shows how to configure custom error pages for all websites on your WHM/cPanel server by creating an error folder and configuring Apache to use it.
How to Do It
-
Step 1: Create the Error Pages Directory
Log in to WHM using your root account.
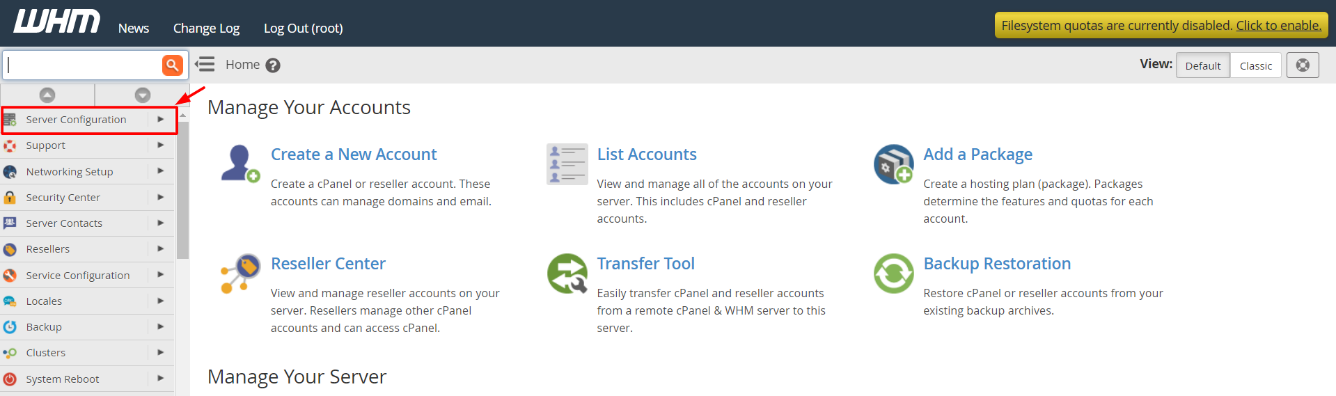
From the navigation menu, choose Server Configuration.
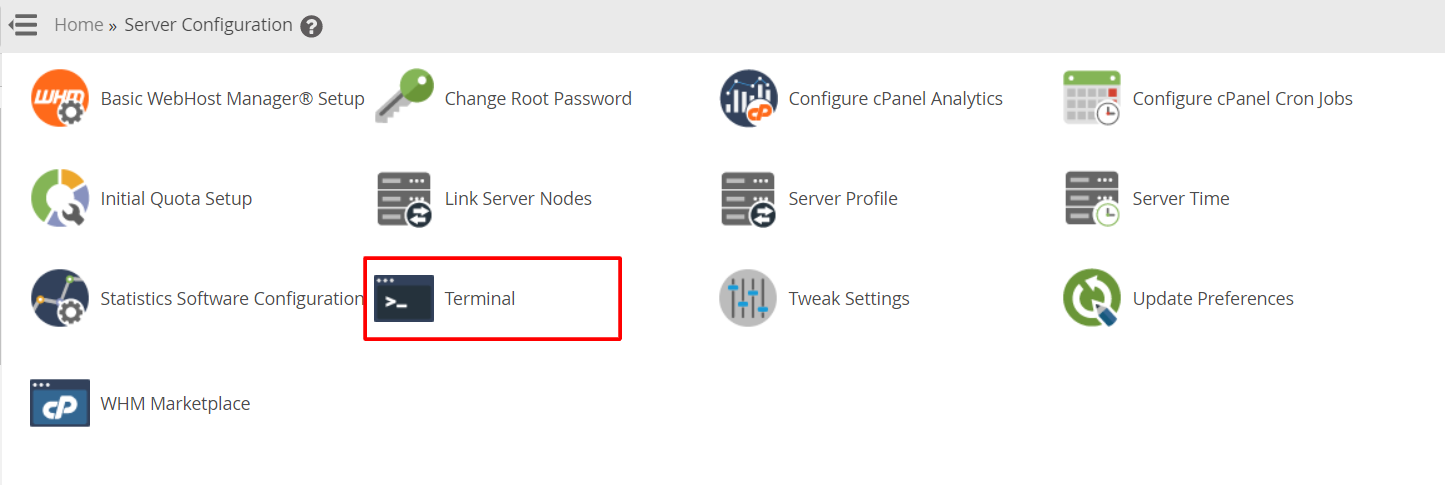
Click on Terminal.
The terminal or SSH command-line interface will open.
Type the following command to create a directory for your custom error pages:
mkdir /usr/local/apache/errorpagesThis creates the
errorpagesfolder where you'll store your custom error HTML files. -
Step 2: Configure Apache to Use Custom Error Pages
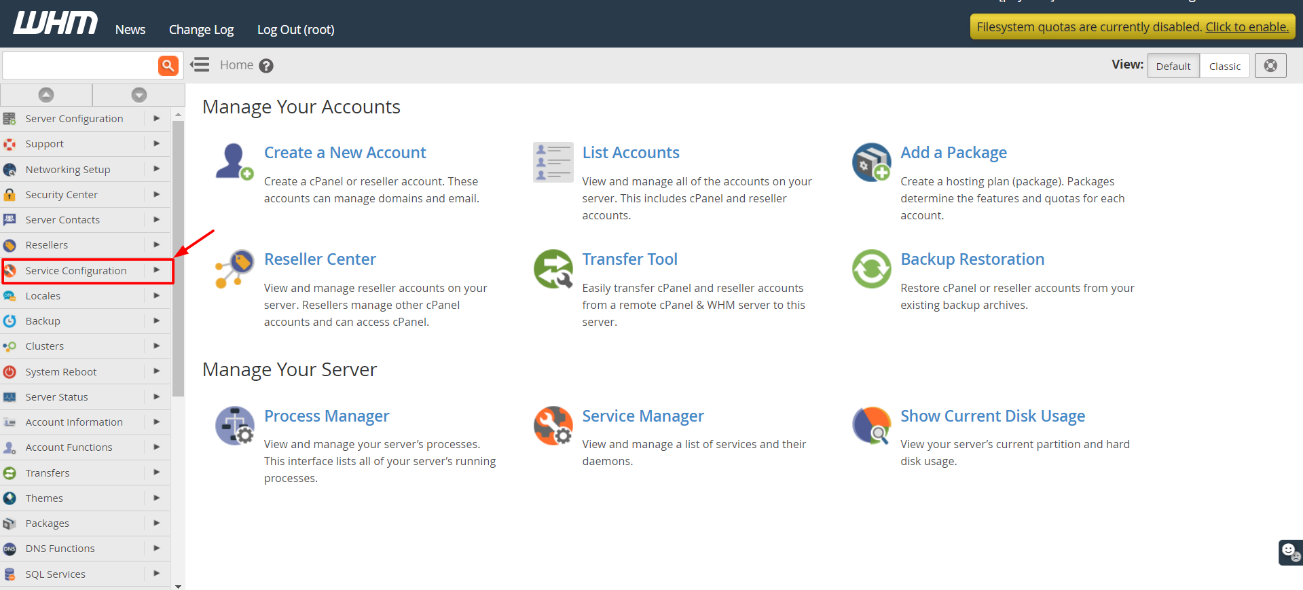
From the navigation menu, choose Service Configuration.
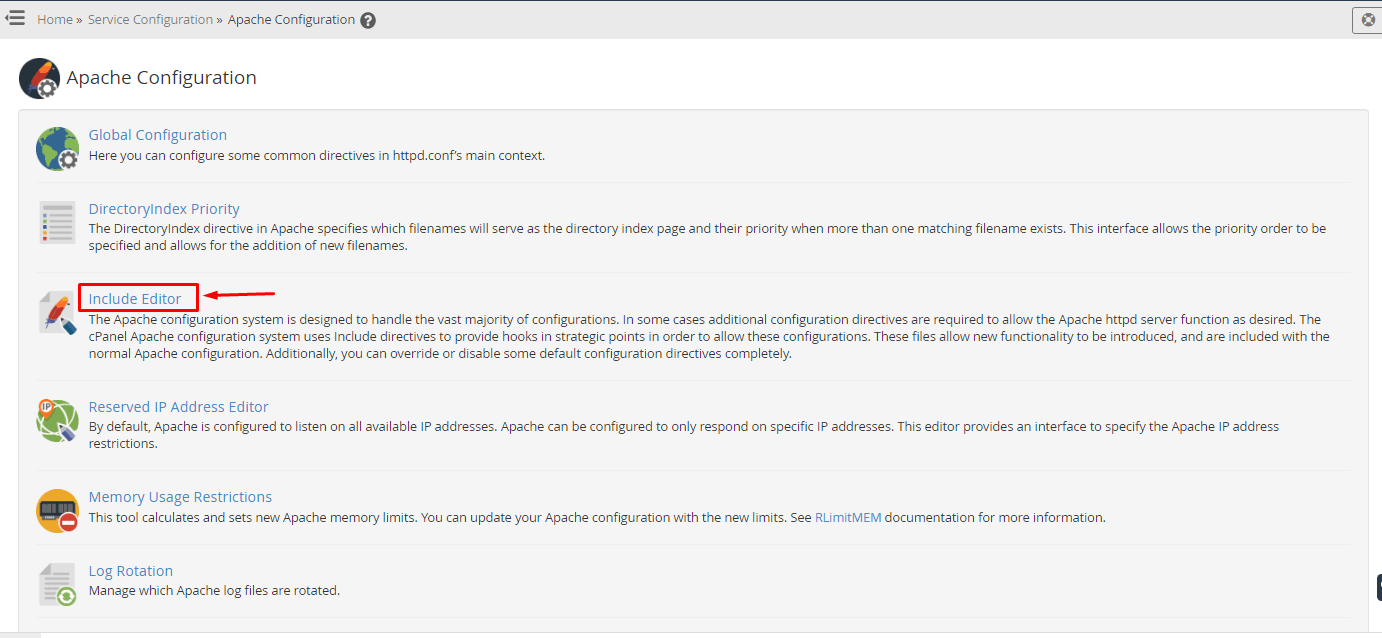
Click on Apache Configuration.
Click on Include Editor.
-
Step 3: Add Error Page Directives
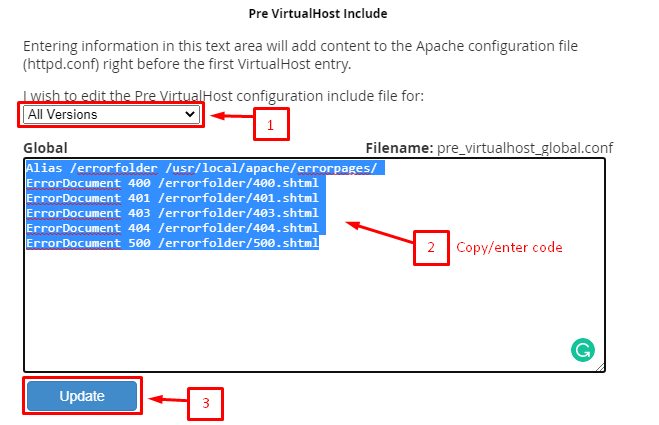
Go to the Pre Virtualhost Include section and select All Versions.
Enter the following code in the Global text box:
Alias /errorfolder /usr/local/apache/errorpages/
ErrorDocument 400 /errorfolder/400.shtml
ErrorDocument 401 /errorfolder/401.shtml
ErrorDocument 403 /errorfolder/403.shtml
ErrorDocument 404 /errorfolder/404.shtml
ErrorDocument 500 /errorfolder/500.shtml
This creates an alias
/errorfolderpointing to your error pages directory and maps common HTTP error codes to specific HTML files.Click the Update button.
-
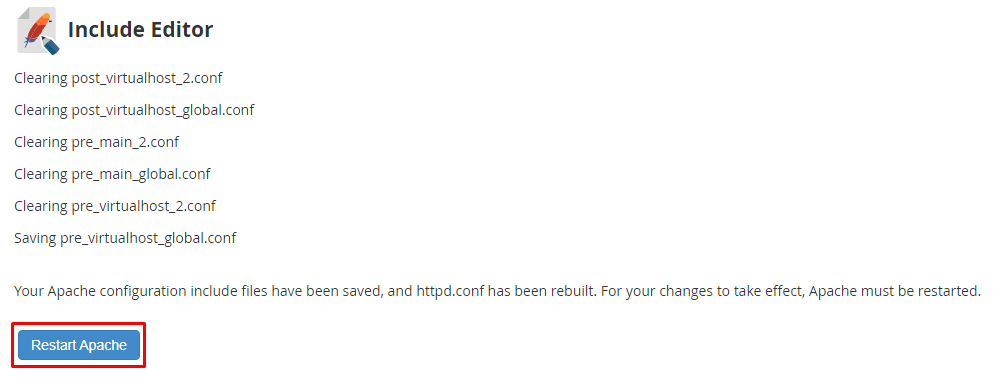
Step 4: Restart Apache
The Apache server will store the changes, but you need to restart it to apply them.
Click on Restart Apache.
Once the server restarts, any HTML pages you upload to the
/usr/local/apache/errorpages/folder will serve as custom error pages for all websites on your WHM/cPanel server.