This guide walks you through restoring a backup for a file or directory in WHM. As an admin user, you can restore any previously backed up file or directory by following these steps. It's crucial to ensure that you have the correct backup file before proceeding with the restoration process to avoid data loss.
How to Restore a Backup
-
Step 1: Access the Backup Restoration Interface
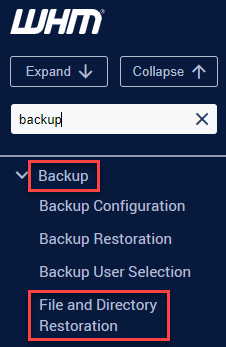
Log in to WHM using your admin credentials. Once logged in, navigate to the Backup section from the main dashboard and click on File and Directory Restoration. This interface allows you to restore specific files or directories from your backups.
-
Step 2: Select the Account
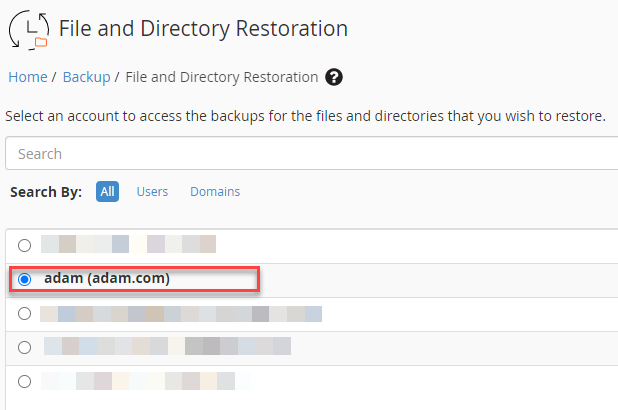
In the File and Directory Restoration interface, you will see a dropdown menu labeled Select a Destination. From this list, choose the cPanel account for which you want to restore the backup. Make sure that you select the correct account as restoration affects only the selected user.
-
Step 3: View Available Backups
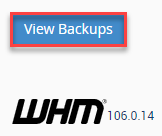
After selecting the account, scroll down to find the View Backup section. Click on this option to list all available backups for the selected account. This will display a calendar interface where you can choose the date of the backup you wish to restore.
-
Step 4: Locate the File or Directory
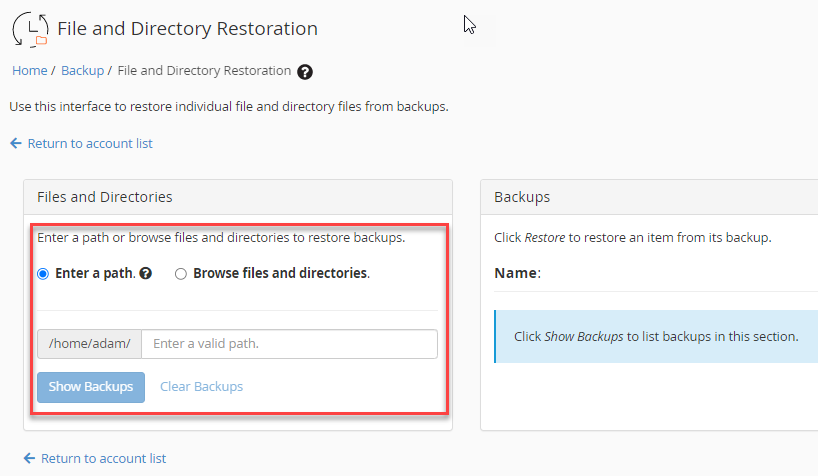
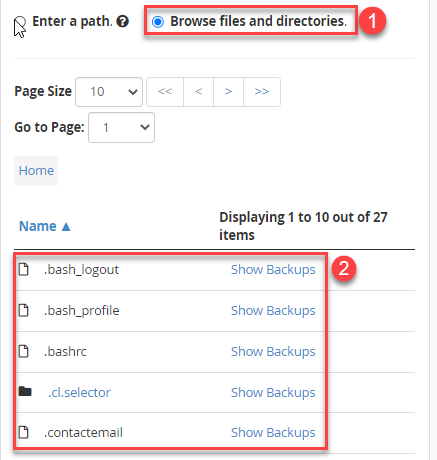
In the next step, you need to specify the file or directory path that you want to restore. You can either enter the path manually in the provided field or use the browse button to navigate through the directories. Once you have entered the correct path, click on Show backups to see all available backup versions of the specified file or directory.
-
Step 5: Browse and Select Backup
If you opted to browse through directories, a list of available files will be displayed. Click on the file or directory you wish to restore to view its backup versions. After selecting the correct version, click on Show backup. This action will display detailed information about the selected backup, including the date and size.
-
Step 6: Restore the Backup
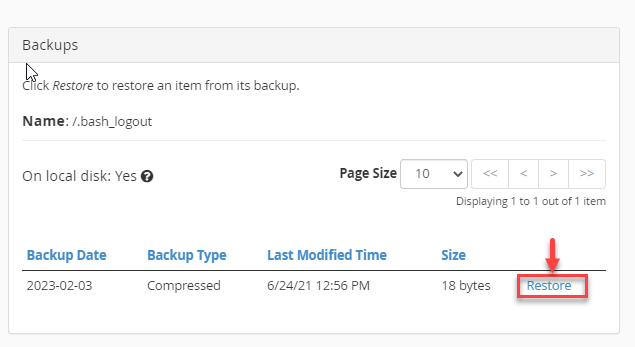
To initiate the restoration process, click on the Restore option. This will prompt WHM to restore the selected backup file or directory to its original location. The restoration process may take some time depending on the size of the file and your server's performance. Once completed, you can verify that the files have been restored by accessing them through the cPanel File Manager.
Need additional assistance? Contact our support team or explore our latest web hosting plans. Remember to regularly back up your data and keep track of backup schedules to prevent data loss in case of any unforeseen circumstances.